Chicken & Poultry
From succulent roasted chickens to mouthwatering turkey dinners and everything in between, our recipes cover a wide range of cooking techniques and flavour profiles to suit every palate and occasion. Whether you’re in search of quick and easy weeknight meals or impressive dishes for special gatherings, our curated selection has you covered. Join us as we explore the versatility of chicken and poultry, providing you with inspiration and recipes to create memorable meals that will delight your family and friends.
-
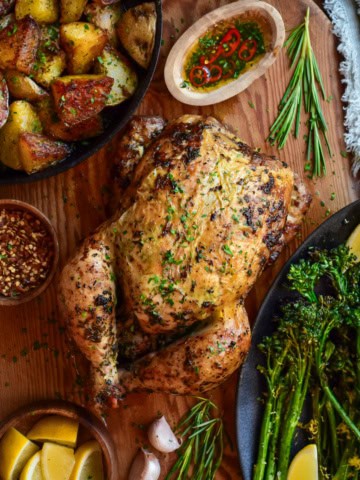
Pellet Grill Rotisserie Chicken With Duck Fat Potatoes
-
Loaded Chicken Souvlaki Pitas with Greenhouse Salad
-
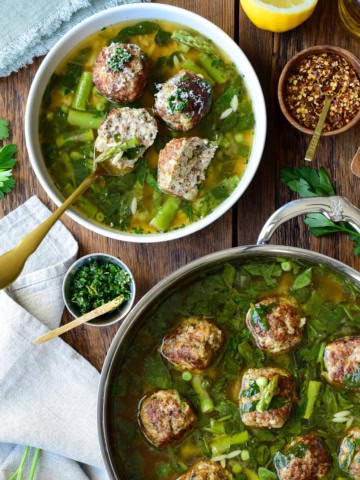
Chicken Ricotta Meatballs with Lemon Orzo Brodo
-
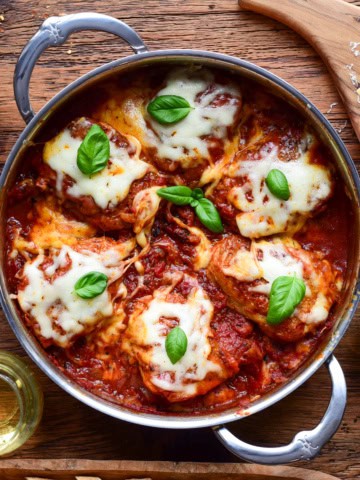
Easy Tomato-Braised Chicken Parmesan Thighs (No Breading)
-
Crispy Maple Gochujang Fire Chicken Thighs (Skillet Recipe)
-
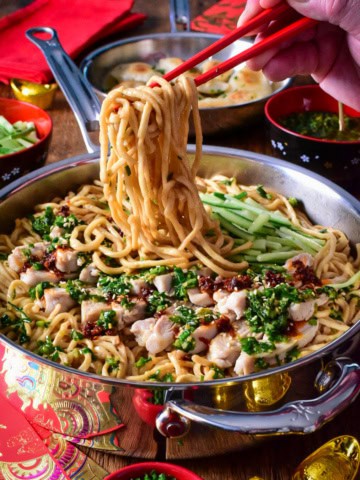
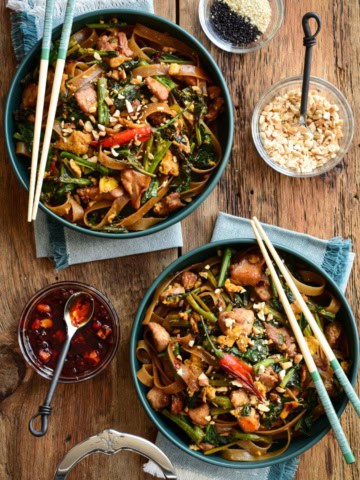
Longevity Noodles (Yi Mein) with Ginger Chive Chicken
-
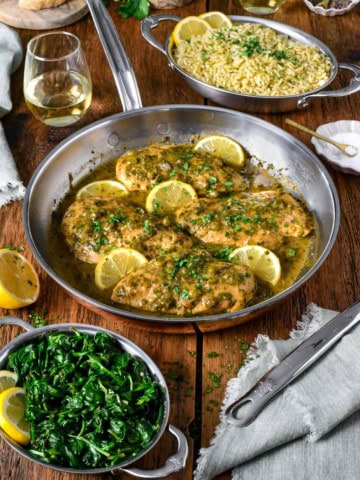
Lemony Chicken Piccata with Orzo and Spinach
-
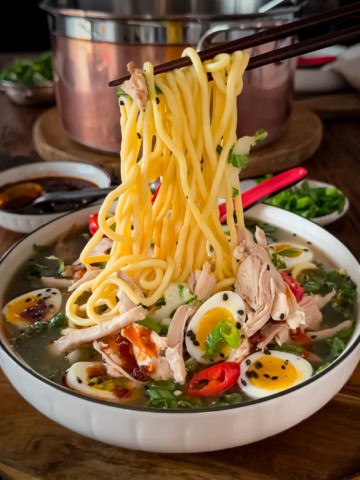
Aromatic Ginger Chicken Noodle Soup with Jammy Quail Eggs
-
Upside Down Puff Pastry Tarts with Turkey Leftovers
-
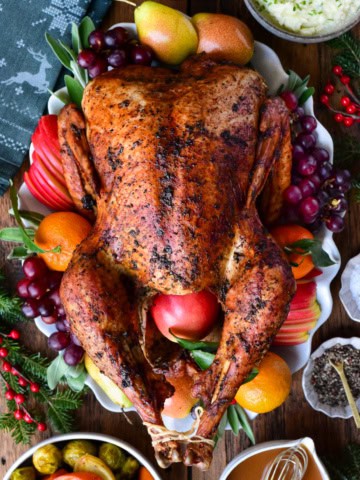
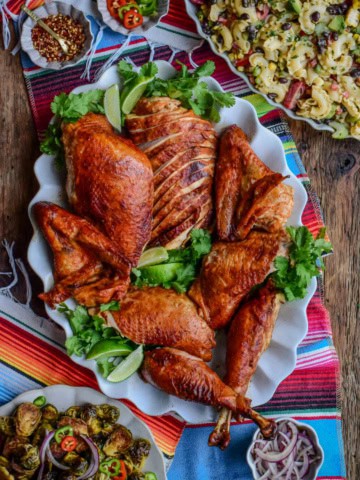
Garlic and Herb Roasted Turkey with Vegetables
-
Easy Tuscan Turkey with Pan Sauce | Dairy Free, Gluten Free
-
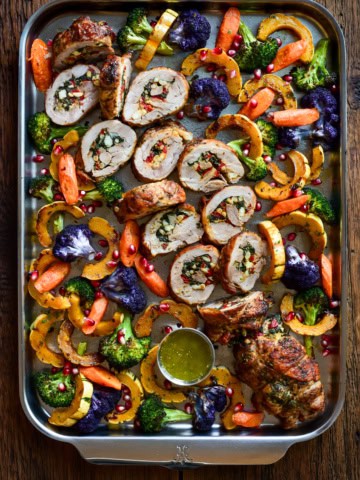
Stuffed Turkey Thighs with Spinach & Feta
-
Turkey Quinoa Stuffed Acorn Squash with Cranberries & Pecans
-
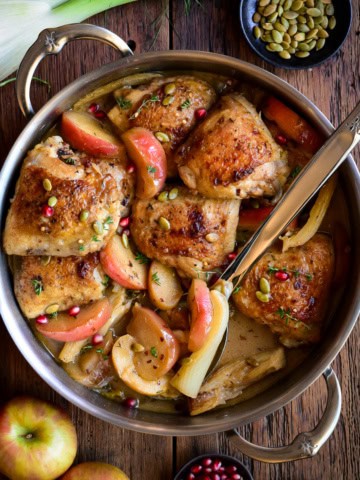
Apple Cider Glazed Chicken with Apples and Fennel
-
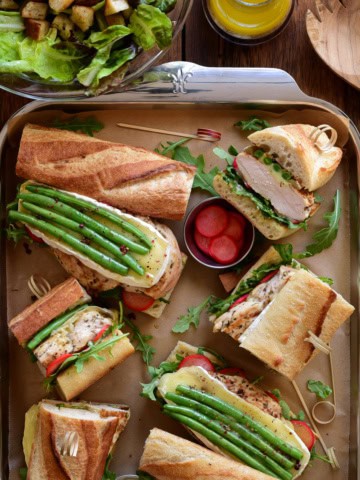
Herbes de Provence Chicken Sandwich with Brie & Dijon Aioli
-
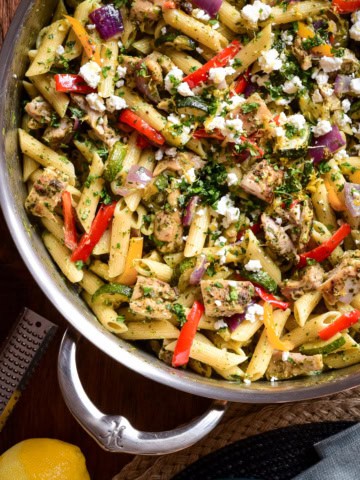
Zhoug Chicken Pasta Salad with Roasted Vegetables
-
Sticky Rum Glazed Chicken Thighs (Grill or Stove)
-
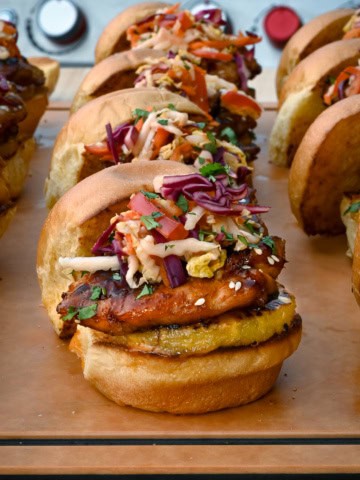
Chicken Teriyaki Sliders with Pickled Asian Slaw
-
Smoked Duck Legs with Charred Scallion Chimichurri
-
Butterflied Chicken Drumsticks with Sweet & Spicy Herb Sauce
-
Crispy Smashed Potato Tostadas with Chicken
-
Chicken Pizzaiola with Pepperoni (Stuffed Recipe)
-
Grilled Gochujang Butterflied Drumsticks
-
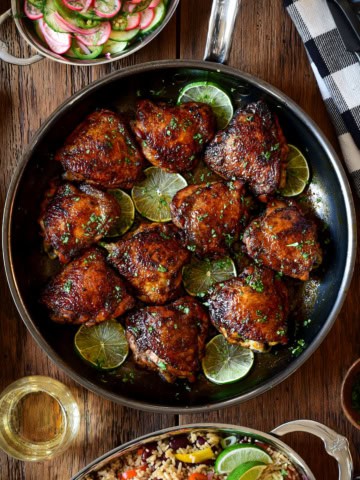
BBQ Jerk Chicken Leg Quarters Recipe
-
Crispy Roasted Duck (Peking-Style)
-
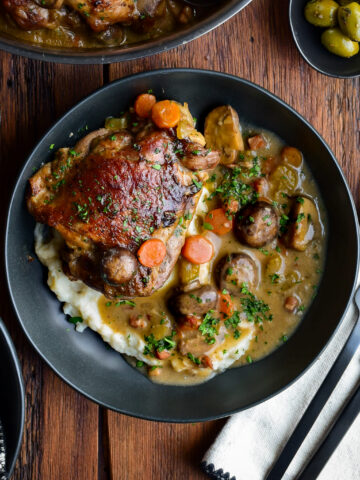
Turkey Au Vin Rosé (Turkey Thighs in Rosé Wine)
-
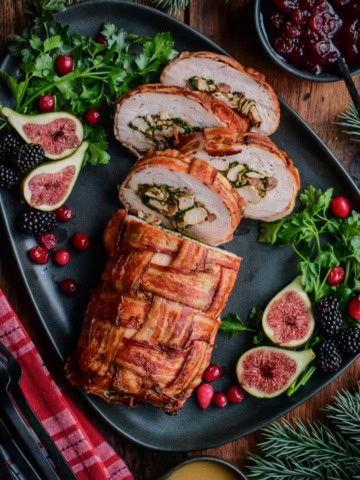
Bacon-Wrapped Stuffed Turkey Breast
-
Baked Pesto Pasta & Chicken
-
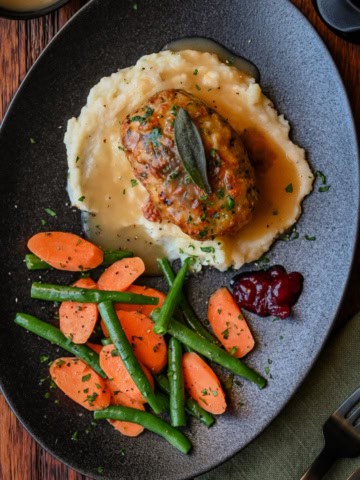
Individual Turkey Meatloaves
-
Grilled Butterflied Turkey Legs
-
Maple Butter & Rosemary Roasted Chicken
-
Roasted Turkey with Adobo Sauce
-
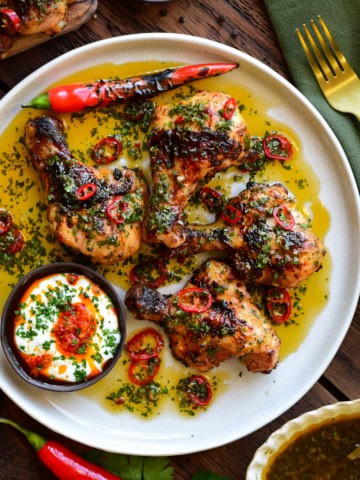
Piri-Piri Chicken Legs
-
Thai Chicken Stir Fry with Rice Noodles
-
Grilled Chicken Souvlaki on Garlic Toast
-
Piri-Piri Chicken with Spicy Rice
-
Air Fryer Chicken Thighs with Chimichurri
-
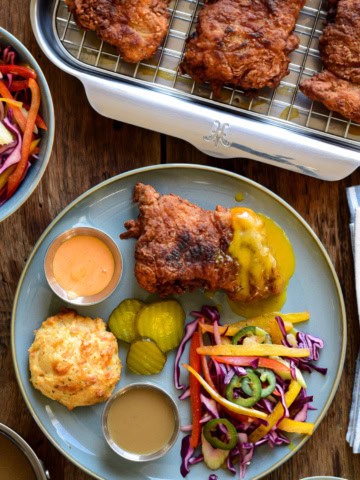
Spicy Buttermilk Fried Chicken
-
Roasted Chicken Tacos
-
Air Fryer Chicken Parmesan Meatballs