Appetizers
Looking for tasty appetizers, recipes for easy Super bowl snacks, New Year’s Eve finger foods or appetizer recipes for a crowd? You have come to the right place!
My Air-Fried Everything Pigs in a Blanket will disappear before the coin toss, so I recommend you double or even triple this recipe! Antipasto Skewers are easy to eat while mingling and waiting for the clock to strike midnight. My easy and delicious Charcuterie Boards can be made ahead using a with a variety of quality deli meats, a selection of cheeses, fruits, nuts, and crackers, so there is something for everyone!
-
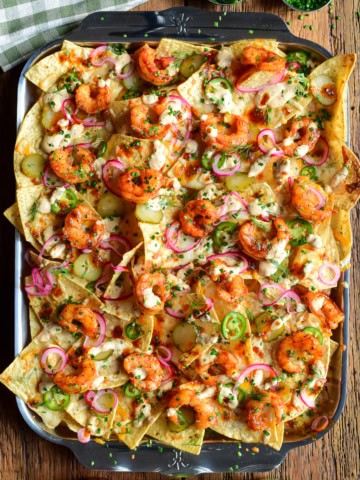
Nashville Hot Honey Shrimp Nachos with Pickle Crema
-
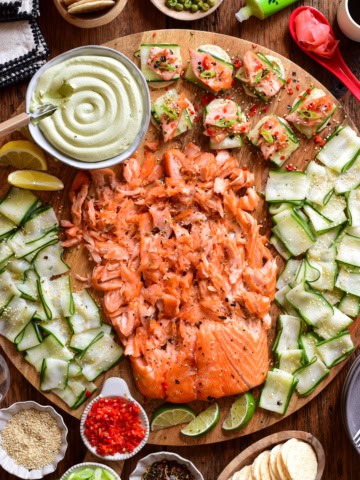
Smoked Salmon Board with Avocado Lime Cream Cheese
-
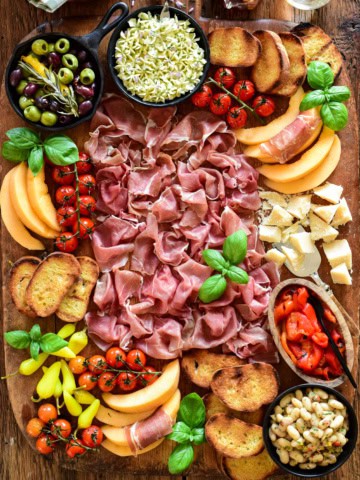
Prosciutto di Parma Antipasto Butter Board
-
Mejillones en Salsa Picante: Spanish Mussels on Half Shell
-
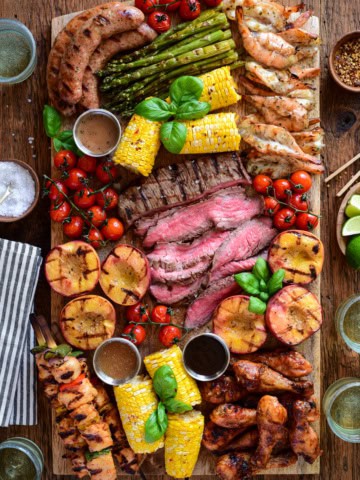
How to Build an Easy Grilled BBQ Charcuterie Board
-
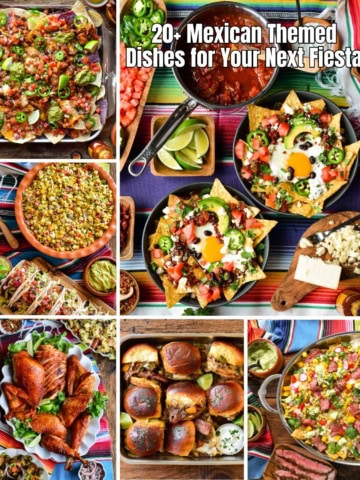
20+ Mexican Themed Dishes for Your Next Fiesta
-
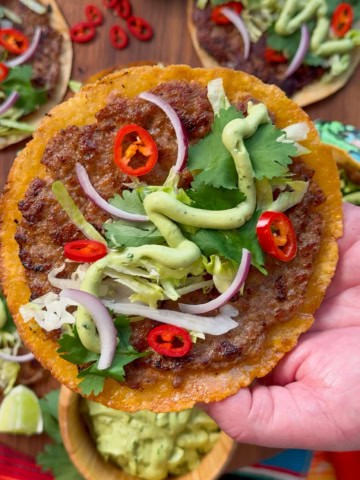
Crispy Pork Smash Tacos with Avocado Lime Crema
-
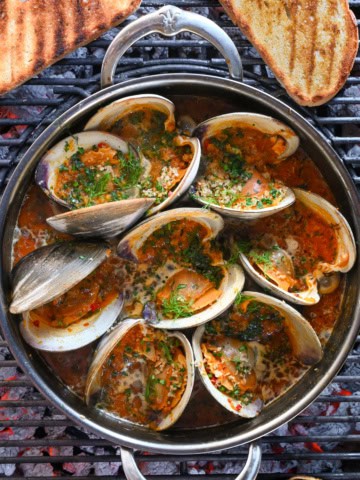
Grilled Clams Casino with Calabrian Chili Sauce
-
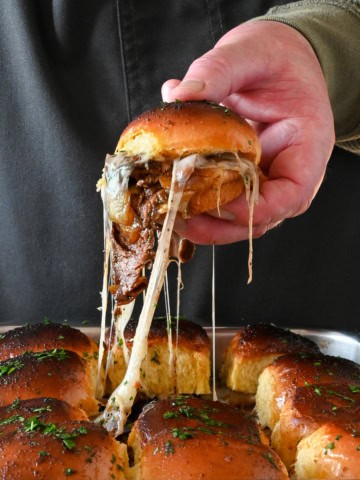
Steak Fajita Pull-Apart Sliders
-
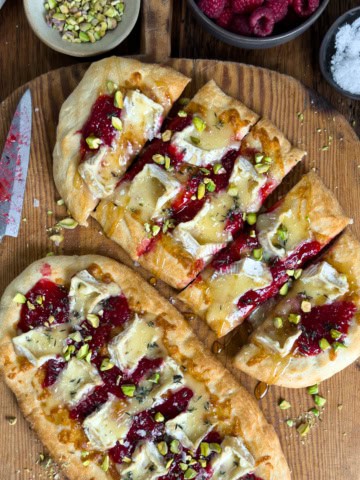
Flatbread Appetizers with Camembert & Raspberry Prosecco Jam
-
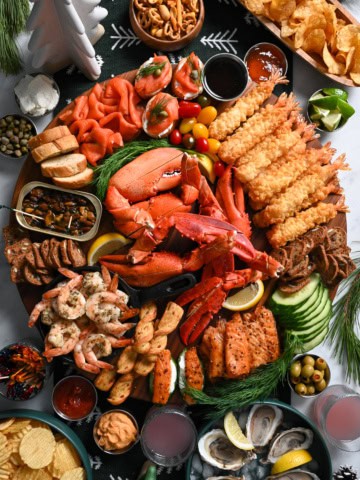
SeaCuterie Board (Seafood Charcuterie Board)
-
PEI Mussels in Cider Broth with Bacon and Cranberry Salt
-
Easy Appetizers With Dates – 3 Festive Skewer Ideas
-
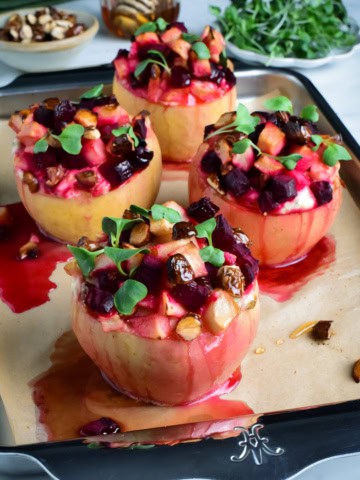
Savory Stuffed Baked Apples with Ricotta, Beets & Honey
-
Lemon–Dill Potato Stacks with Greek Yogurt & Capers
-
Pumpkin Pear Pizza with Prosciutto and Hot Honey
-
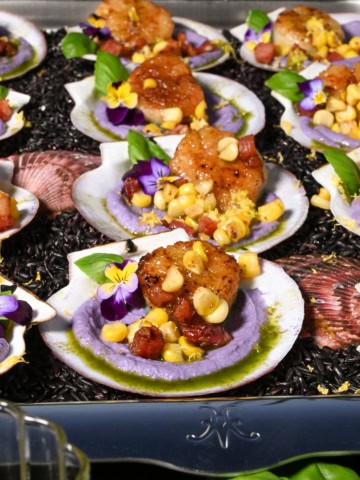
Pan Seared Scallops with Cauliflower Puree
-
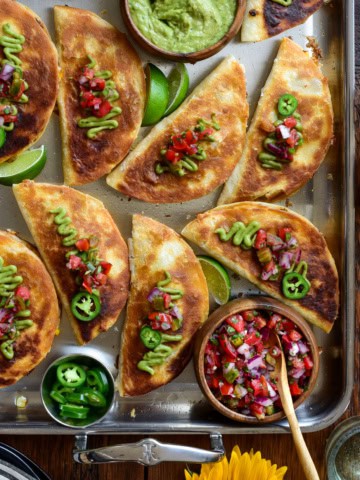
Cheesy Chorizo Quesadillas with Corn and Manchego
-
Charred Corn, Poblano and Jalapeño Dip (Grill or Oven)
-
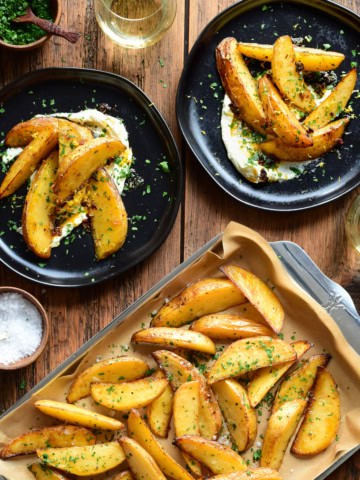
Greek-Style Lemon Potato Wedges with Whipped Feta
-
Greek Fried Cheese 🔥 Saganaki with Kefalotyri Cheese
-
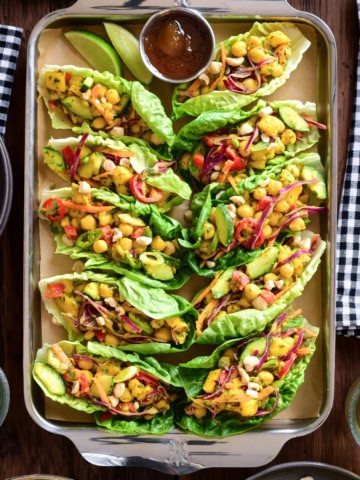
Curried Coconut Chickpea and Mango Salad (Vegan & Picnic-Ready)
-
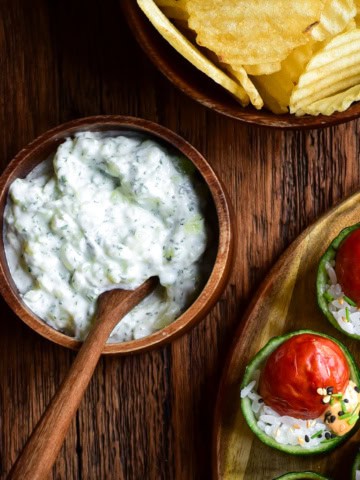
Easy Cucumber Mint Yogurt Dip (Zero Waste Recipe)
-
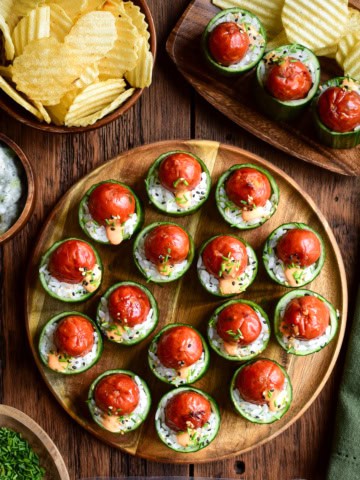
Smokie Popper Sushi-Style Bites in Cucumber Cups
-
Grilled Lil Smokies with Elote-Inspired Topping
-
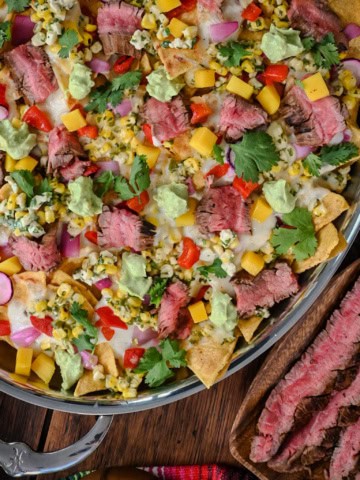
Carne Asada Nachos with Elote Salsa & Oaxaca Fondue
-
Guinness Mac and Cheese – With Irish Whiskey Onions
-
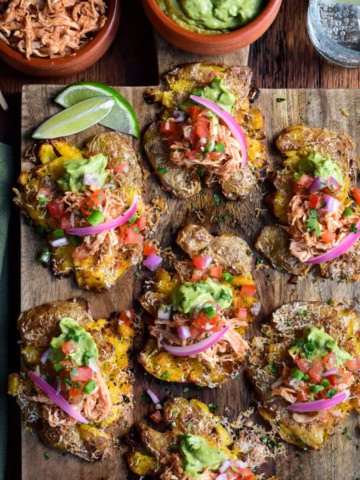
Crispy Smashed Potato Tostadas with Chicken
-
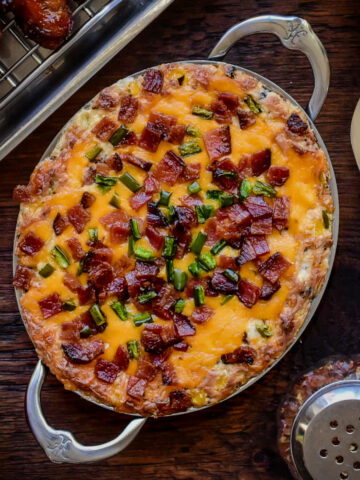
Baked Jalapeno Popper Dip (Easy Game Day Dip)
-
Surf and Turf Phyllo Bundles
-
Egg Salad Temaki Rolls
-
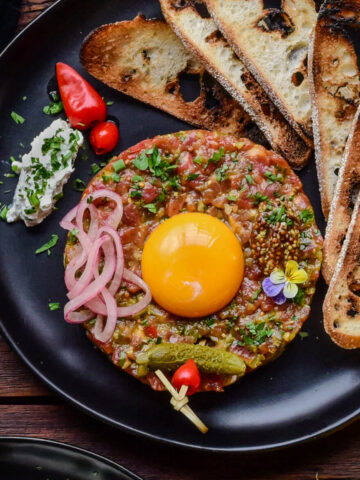
Date Night Steak Tartare
-
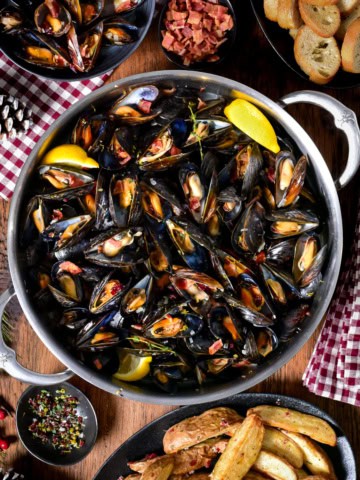
Mussels In Spicy Tomato Broth
-
Grilled Butterflied Turkey Legs
-
Chili-Stuffed Jalapeño Poppers
-
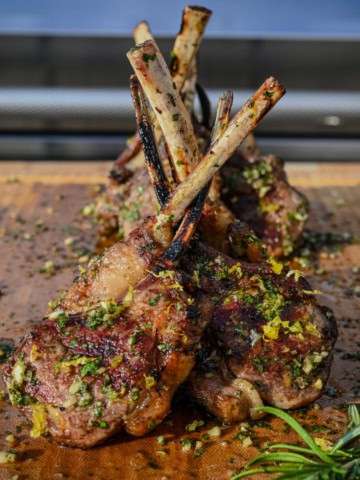
Grilled Frenched Lamb Chops with Board Sauce
-
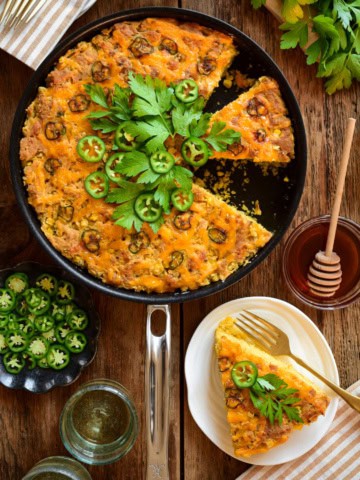
Grilled Jalapeño Cheddar Cornbread
-
Grilled Peach & Tomato Crostini with Whipped Feta
-
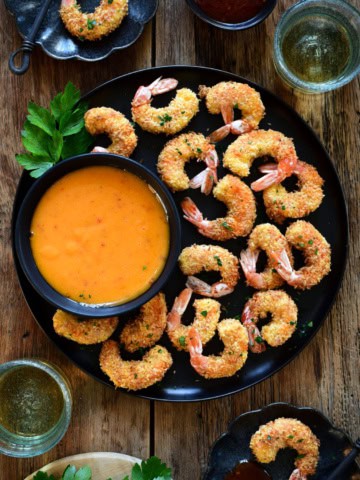
Air Fryer Coconut Shrimp
-
Grilled Chicken Souvlaki on Garlic Toast