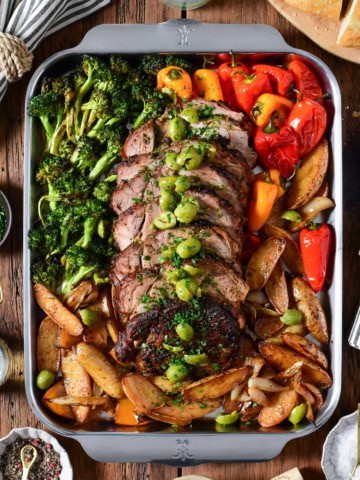
Mains
From comforting classics to innovative creations, our curated collection covers a wide range of cuisines and cooking techniques to suit every taste and occasion. Whether you’re planning a weeknight family dinner, a cozy date night, or entertaining guests, our recipes will inspire you to create memorable mains that are sure to impress.
-
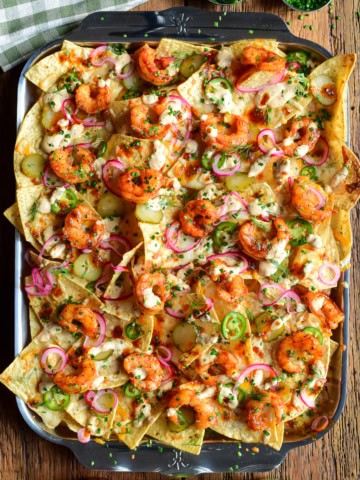
Nashville Hot Honey Shrimp Nachos with Pickle Crema
-
Chimichurri Steak Flatbread with Whipped Feta
-
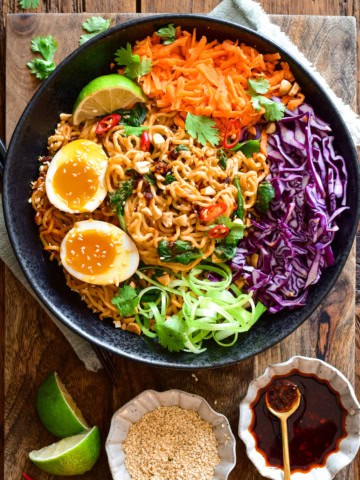
Chili-Crunch Almond Butter Noodles
-
Sausage and Egg Breakfast Smash Burger
-
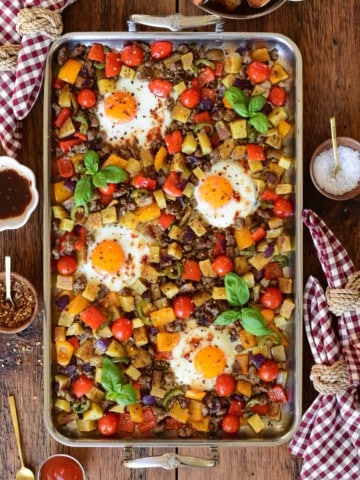
Italian Sausage & Peppers Breakfast Hash on the Griddle
-
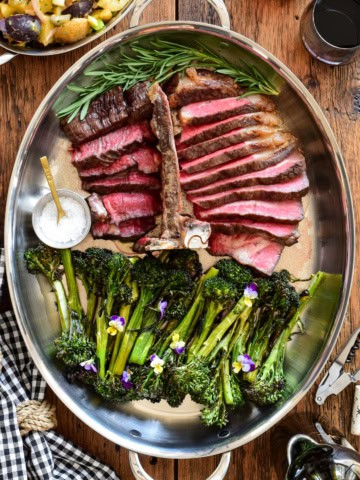
Thick Cut Reverse Sear T-Bone Steak
-
Steakhouse Peameal Bacon Sandwich with Mushrooms
-
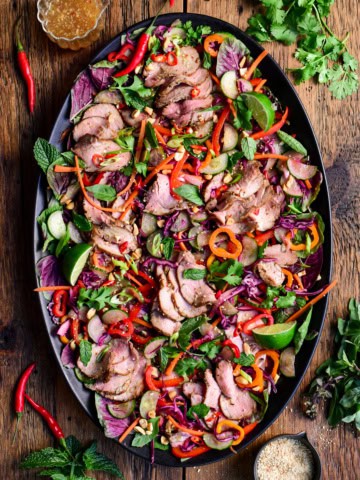
Spicy Thai Pork Tenderloin Crunchy Herb Salad
-
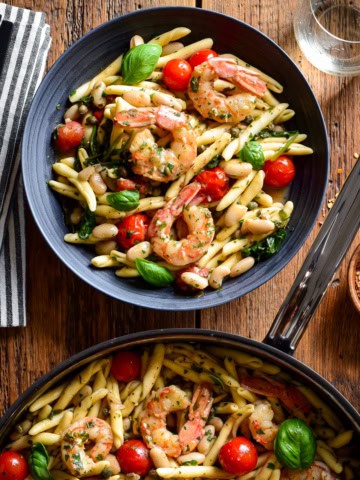
Lemon Caper Shrimp Piccata Pasta with White Beans
-
Nashville Hot Honey Veal Cutlet Sandwich
-
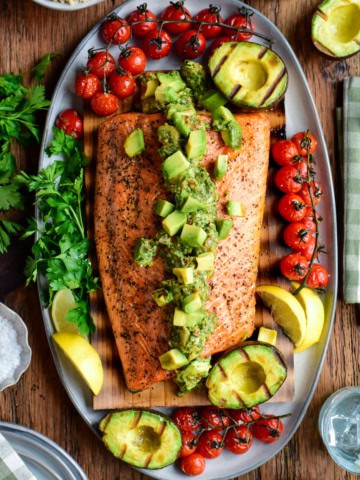
Cedar Planked Salmon with Grilled Avocado Chimichurri
-
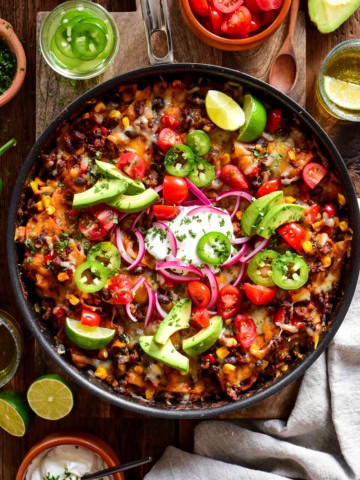
Beef, Black Bean & Poblano Skillet (No Roll) Enchiladas
-
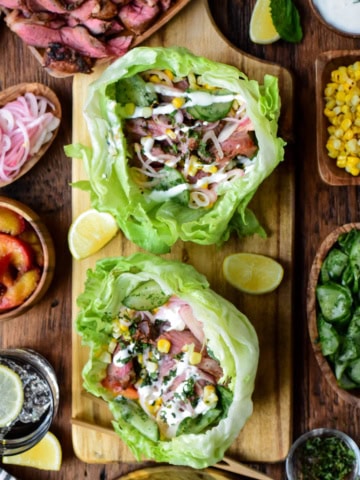
Sticky Hot Honey Lamb Lettuce Wraps
-
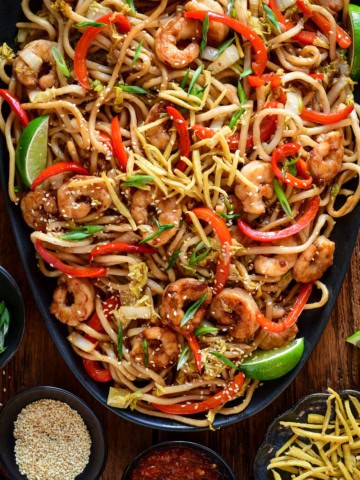
Sticky Soy Argentinian Shrimp & Fried Ginger Udon
-
Korean Bulgogi Cheesesteak with Kimchi & Provolone
-
Tableside Pour-Over Chili Cheese Dogs
-
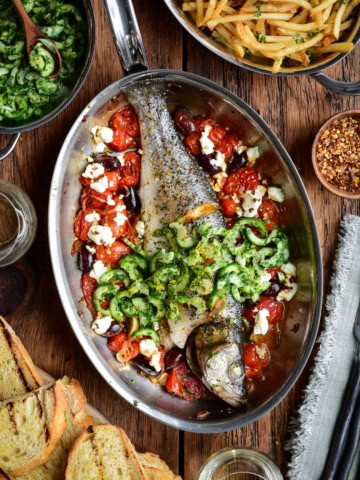
Greek Style Whole Roasted Branzino with Tomatoes & Feta
-
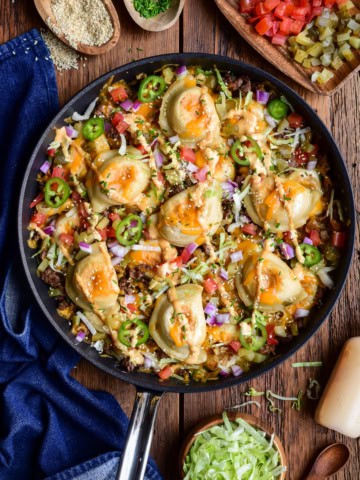
Crispy Cheeseburger Pierogi Skillet with Caramelized Onions
-
Charcoal Grilled Bratwurst with Pickled Apples & Sauerkraut
-
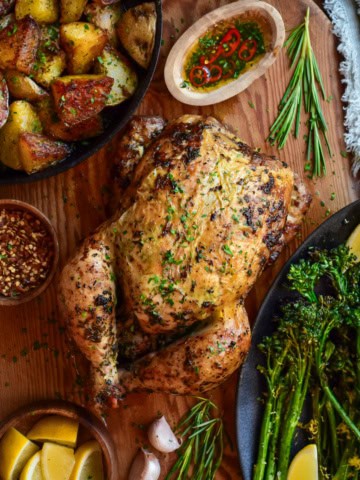
Pellet Grill Rotisserie Chicken With Duck Fat Potatoes
-
20+ Mexican Themed Dishes for Your Next Fiesta
-
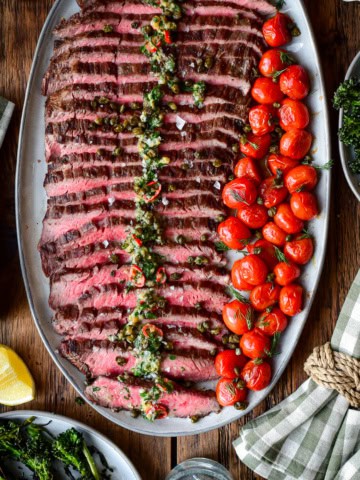
Grilled Flank Steak with Roasted Garlic Lemon Butter
-
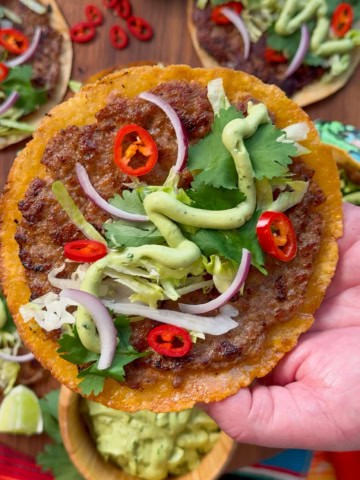
Crispy Pork Smash Tacos with Avocado Lime Crema
-
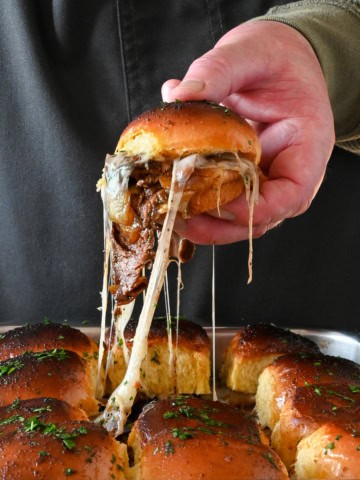
Steak Fajita Pull-Apart Sliders
-
Baked Black Cod with Thai Peanut Curry Sauce & Crispy Rice
-
Loaded Chicken Souvlaki Pitas with Greenhouse Salad
-
Creamy Sausage, Pepper & Tomato Orzo Skillet
-
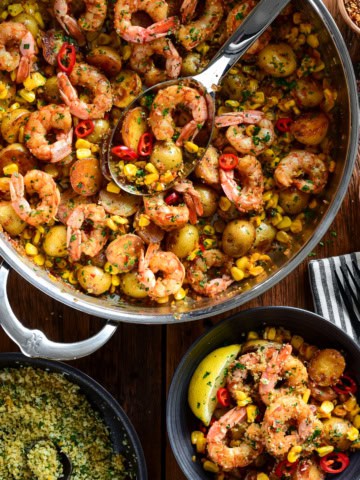
Spicy Calabrian Shrimp with Corn, Potatoes & Pangrattato
-
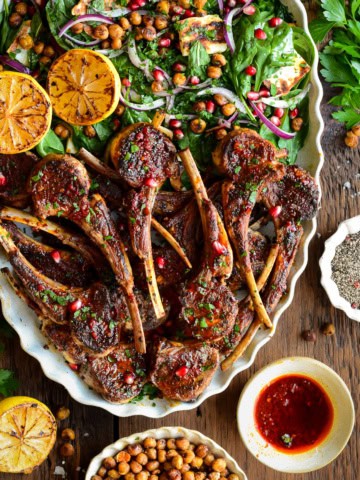
Harissa Lamb Chops with Crispy Chickpea & Halloumi Salad
-
Chili-Lime Pork Chops with Grilled Pineapple
-
Crispy Skin Salmon with Minty Pea Purée & Roasted Potatoes
-
Chicken Ricotta Meatballs with Lemon Orzo Brodo
-
Easy Tomato-Braised Chicken Parmesan Thighs (No Breading)
-
Lamb Sirloin Steak Frites with Green Peppercorn Sauce
-
Greek Lemon Oregano Pork Roast with Fingerling Potatoes
-
Crispy Maple Gochujang Fire Chicken Thighs (Skillet Recipe)
-
Roasted Carrot Chowder with Butter Beans & Corn (Dairy-Free)
-
Garlic & Anchovy Lamb Loin Chops With Warm Salsa Verde
-
Reverse Sear Veal Tenderloin with Dijon Cognac Sauce
-
Citrus Marinated Grilled Pork (Poc Chuc) Double Decker Tacos