

This Green Goddess Quiche with Zucchini & Feta is elegant, packed with fresh flavors, and surprisingly easy to make. The custard-like filling is packed with spinach, basil, and tarragon, giving it a bright, herby kick. Creamy feta adds just the right amount of tang, and the zucchini ribbons on top make it look like something straight out of a bakery window.

Pairs perfectly with a simple salad with cherry tomatoes, red onions, and basil for a fresh and vibrant meal. This is a great option for brunch, lunch or light dinner, and it is a guaranteed crowd-pleaser!
Jump to:
Ingredients
For the Crust
- All-purpose flour
- Almond meal (or almond flour)
- Salt
- Unsalted butter, cold and cubed
- Egg yolk
- Ice water
Filling Ingredients
- Fresh spinach, packed
- Fresh basil leaves
- Fresh tarragon leaves
- Fresh chives
- Eggs
- Heavy cream
- Whole milk
- Salt
- Black pepper
- Ground nutmeg
- Teta cheese
- Medium zucchini
For Serving
- Lemon zest
- Tomato salad, optional
See recipe card below for quantities.
Instructions
Make the Dough
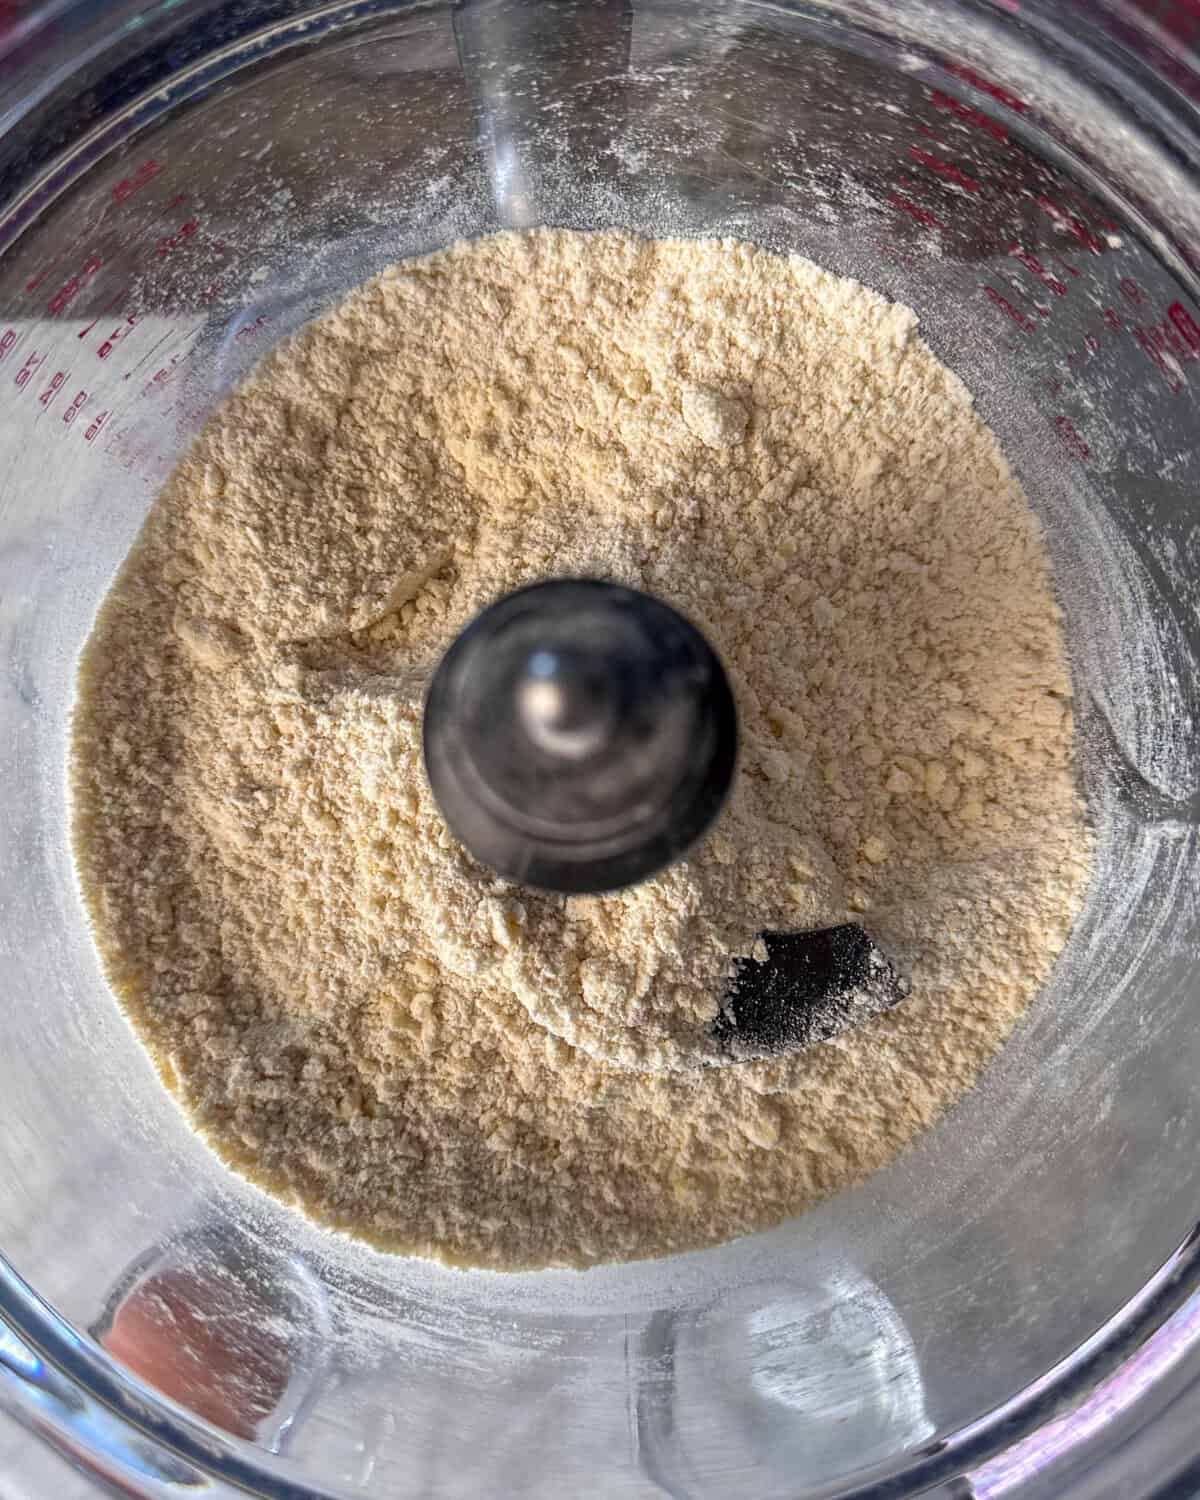
In a food processor with a dough blade, pulse the all-purpose flour, almond flour, and salt.
Add cold butter and pulse until the mixture resembles coarse crumbs.
Add the egg yolk and pulse again.
Drizzle in ice water, one tablespoon at a time, until the dough just comes together.

Shape the dough into a thick disk, wrap it in plastic, and refrigerate it for at least 30 minutes.

Prepare the Pan
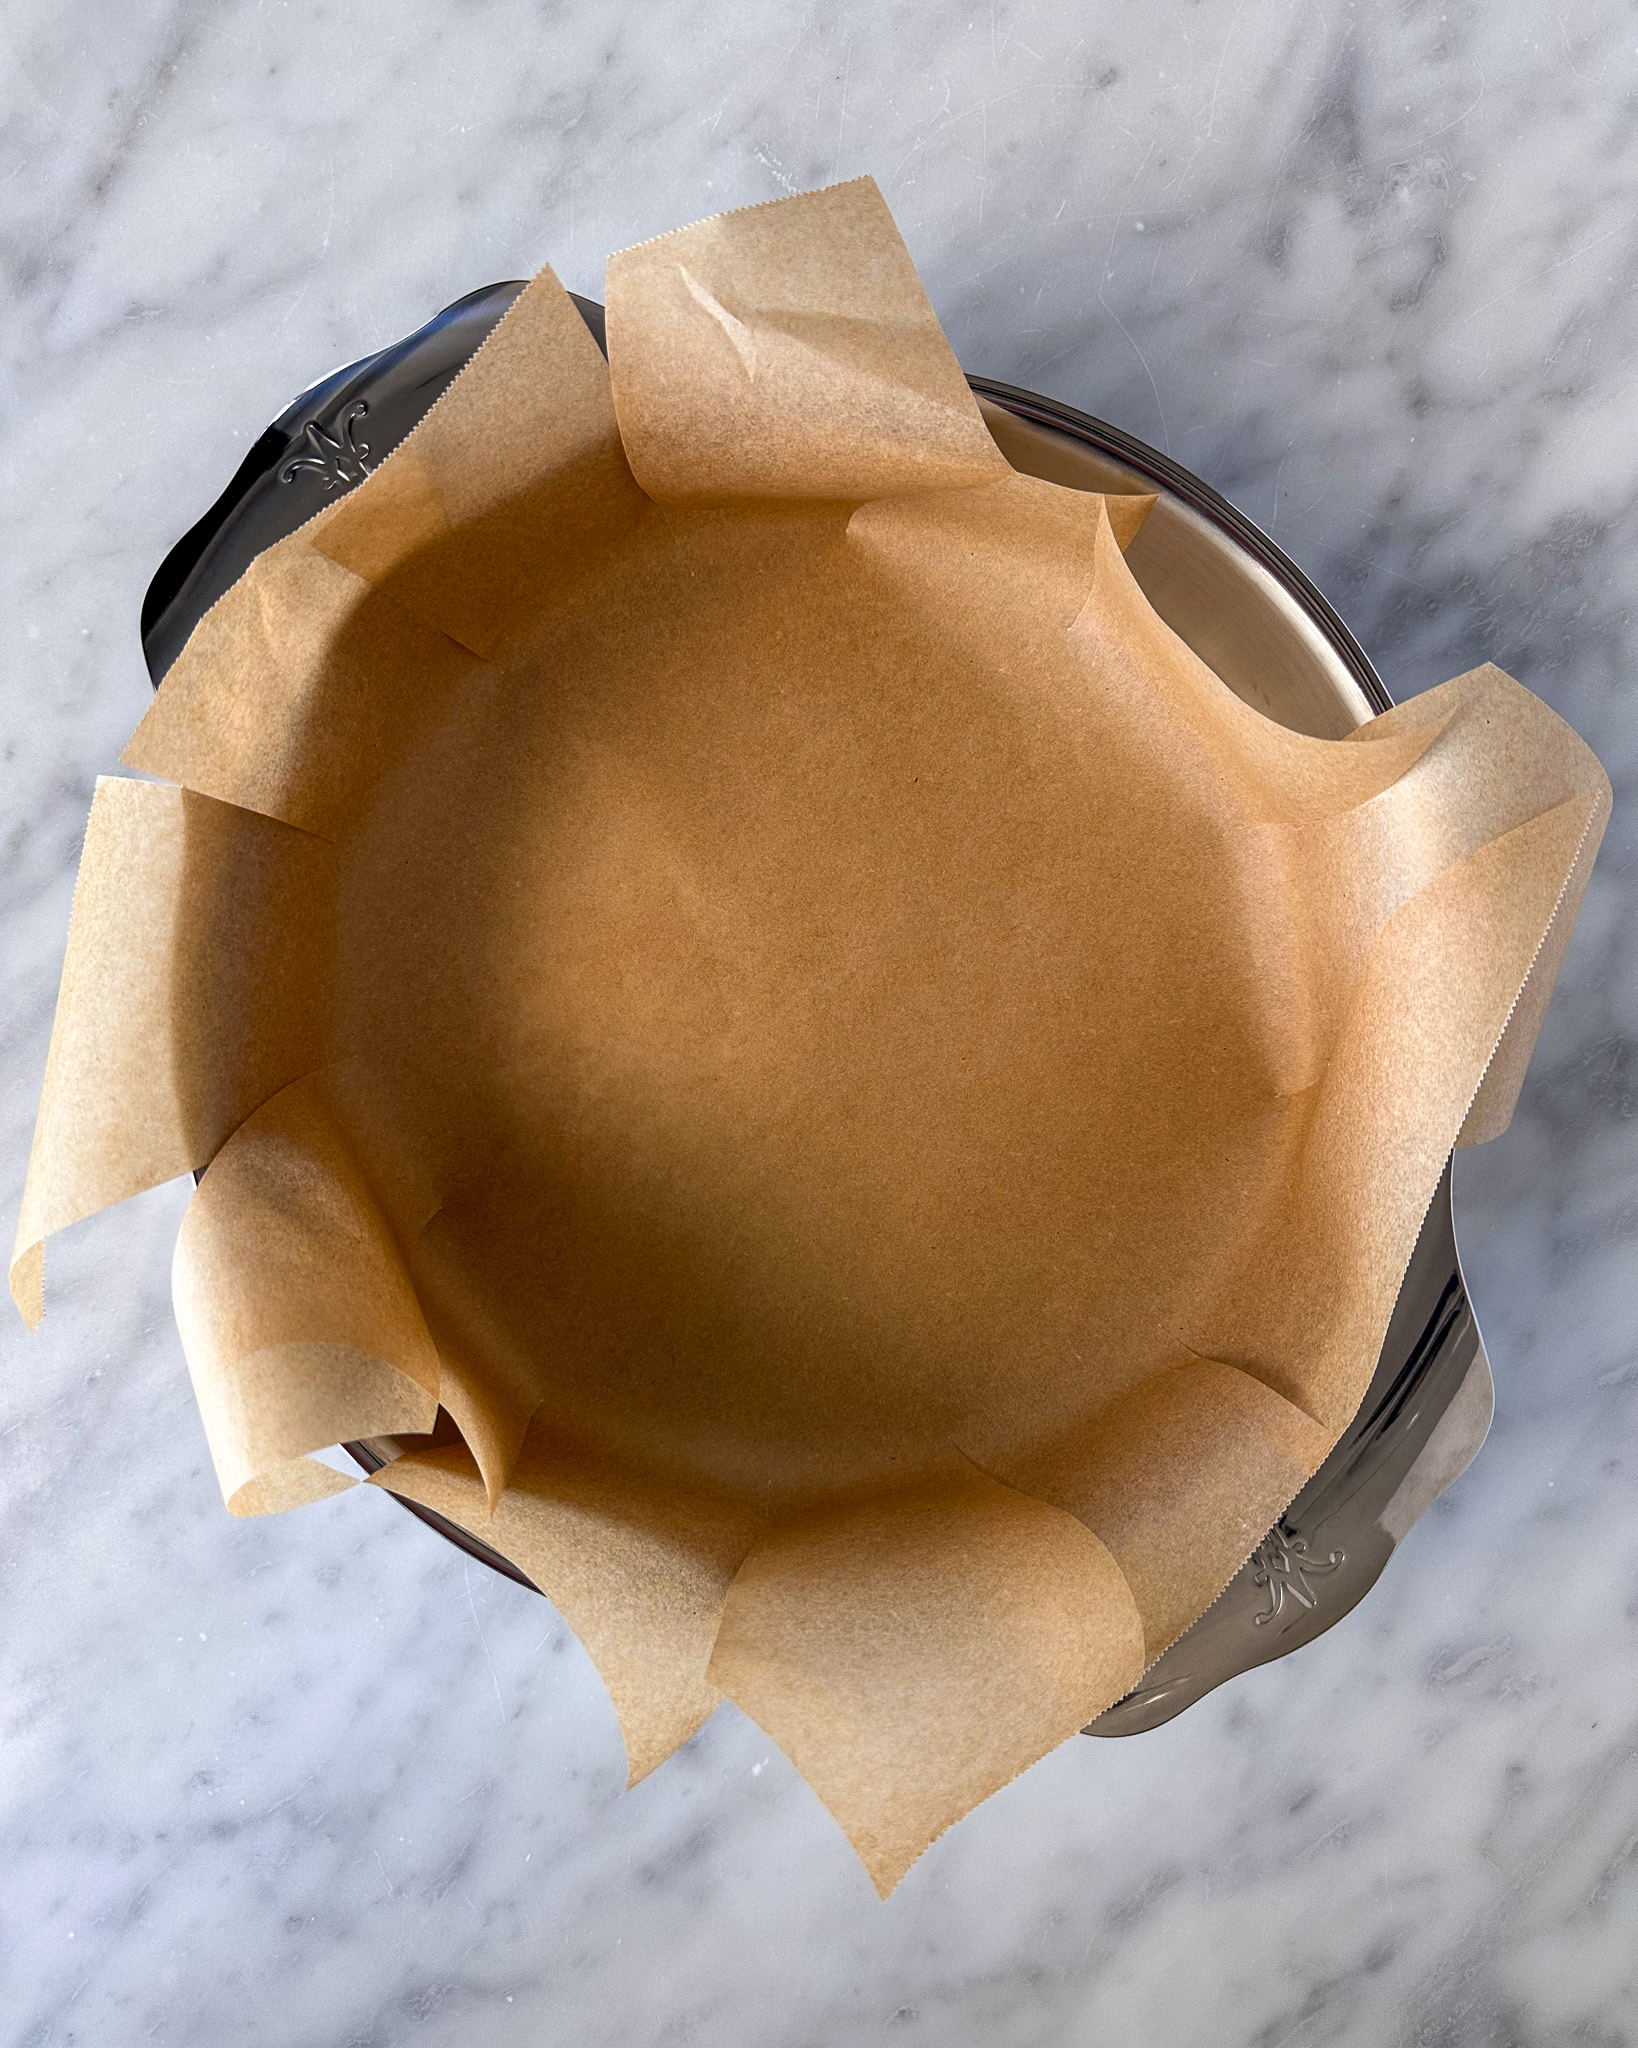
Cut a 16-inch piece of parchment paper. Flip the 9" round cake pan upside down and centre the parchment over it.
Make diagonal cuts every 2 inches from the edge of the parchment to the rim.
Place the pan upright and tuck the parchment inside, ensuring it lines the bottom and sides.

Rolling Out & Pressing the Dough Into the Pan
Flour Your Surface & Roll the Dough:
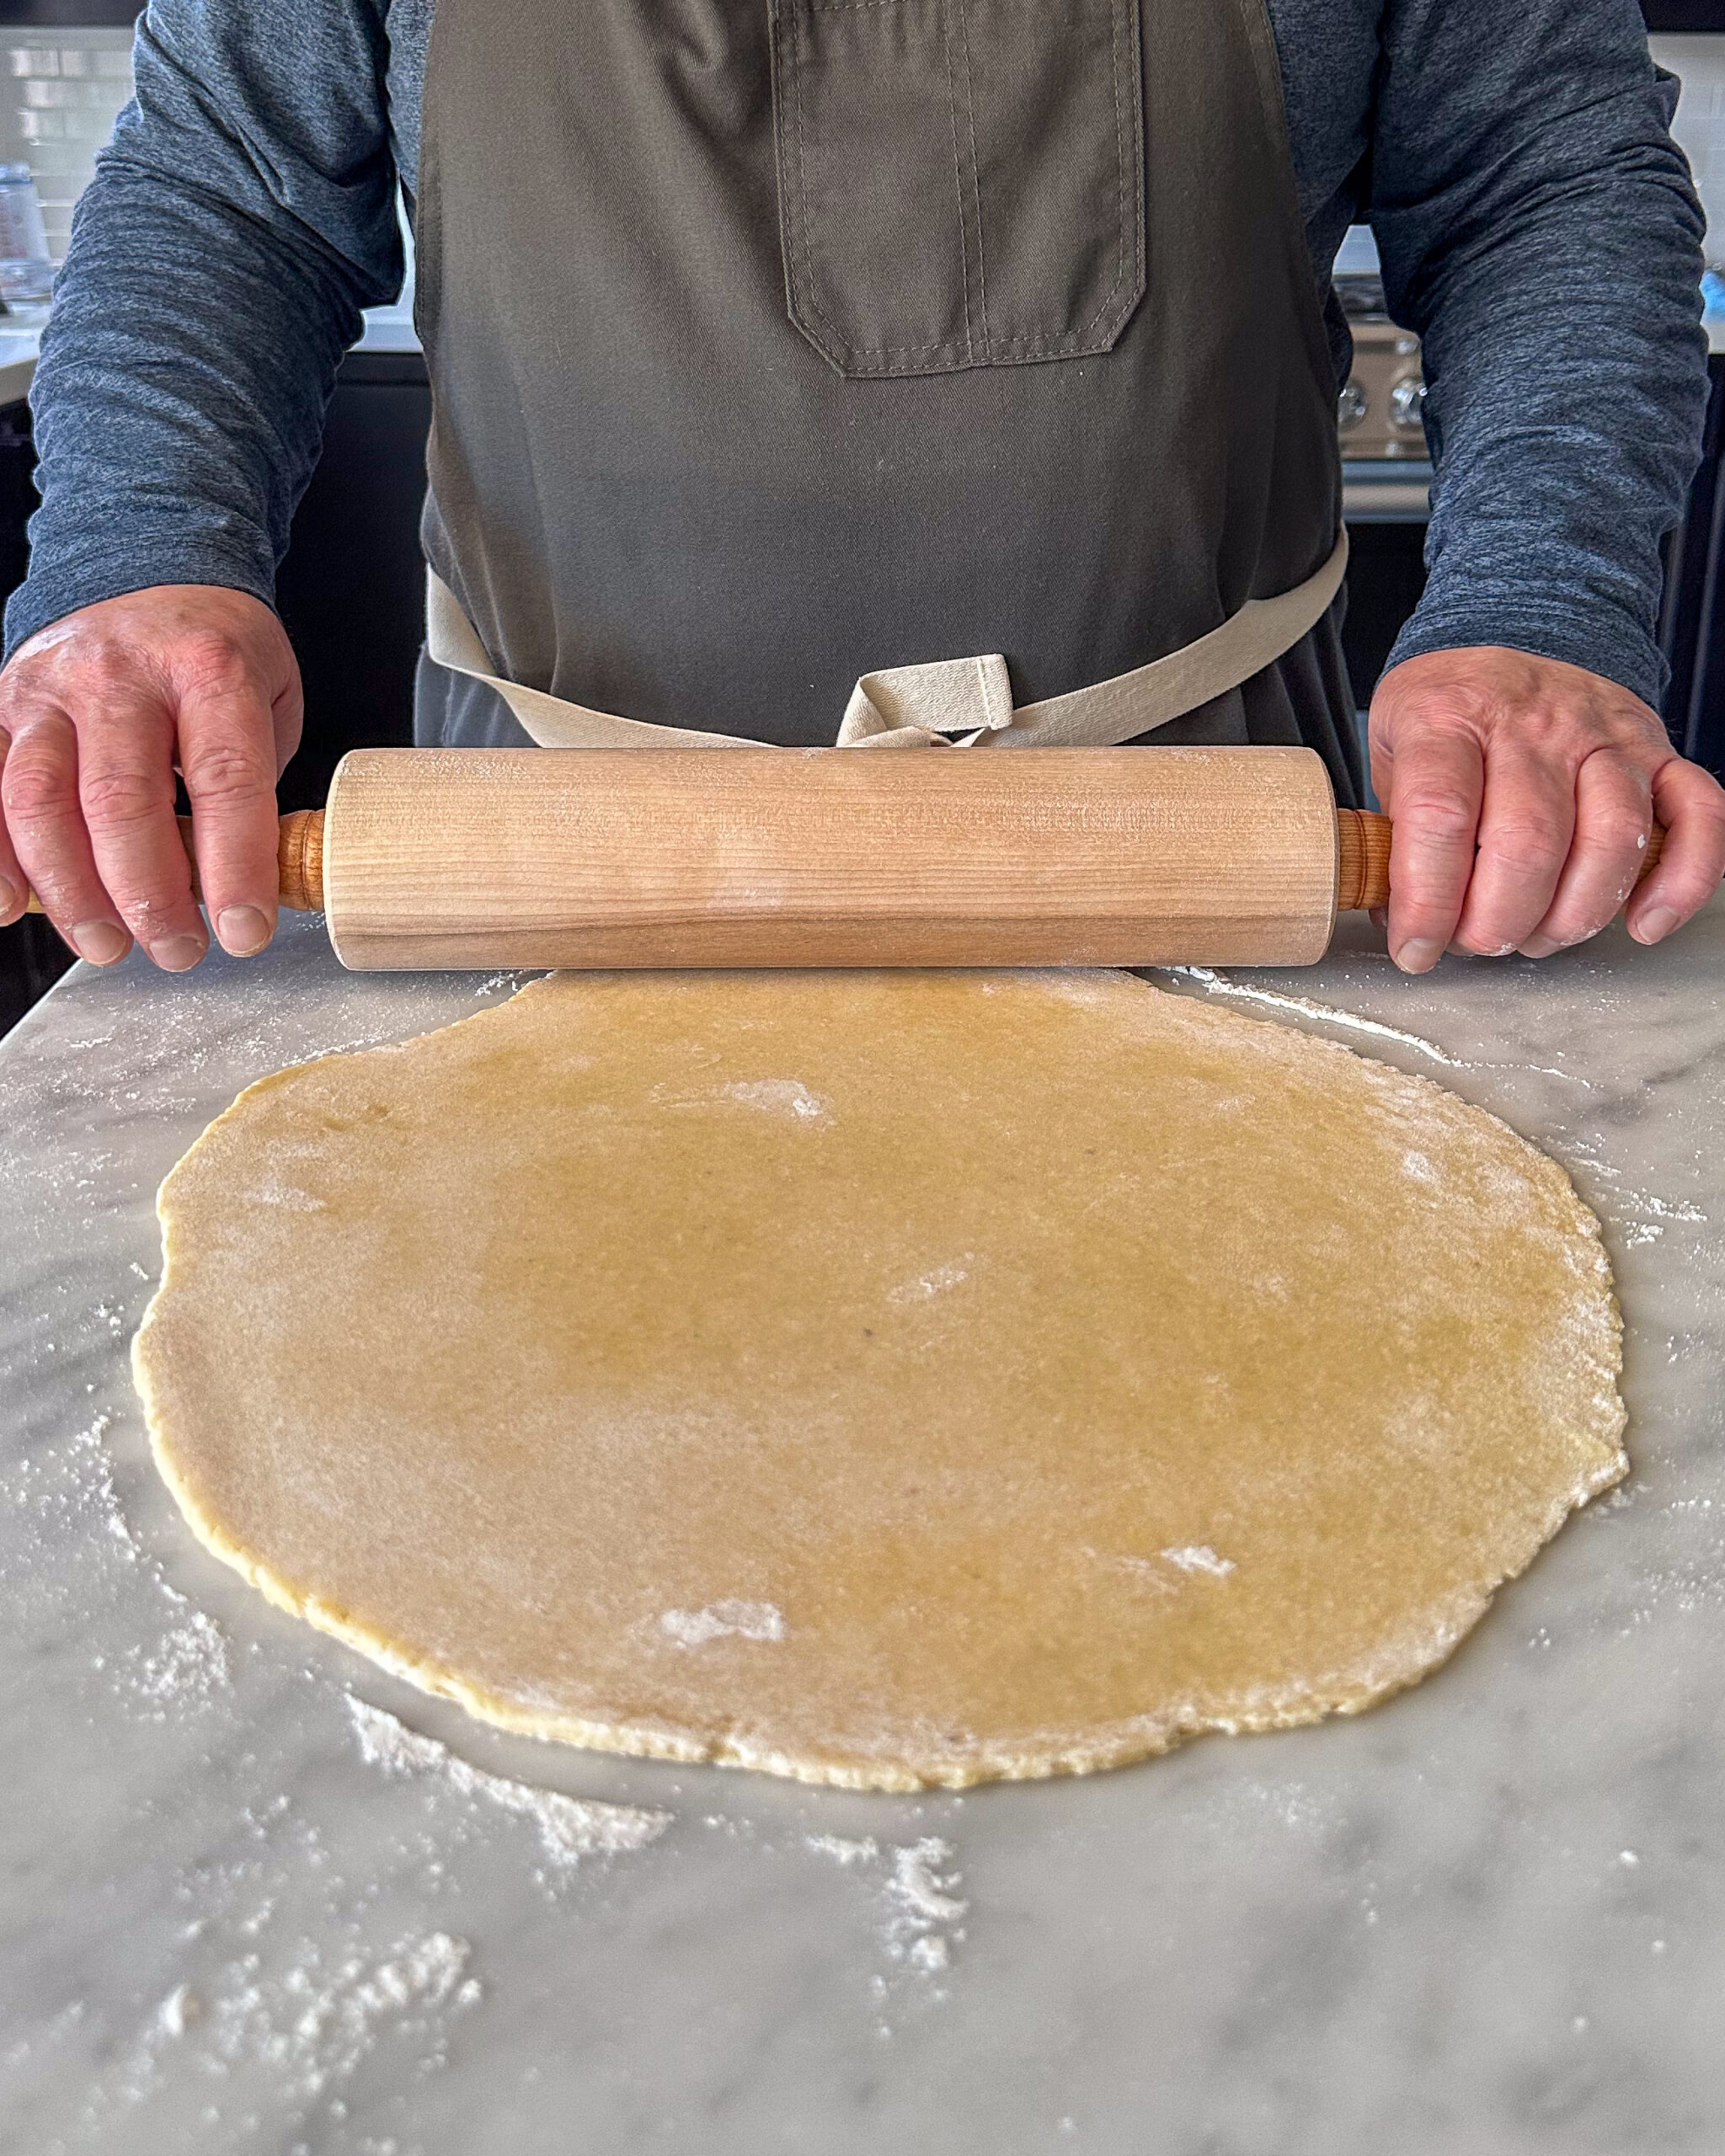
Add a dusting of flour over your work surface and on your rolling pin to prevent sticking.
Roll the dough into a 13-inch circle (about ¼ inch thick). This gives you enough dough to cover the bottom and press up the 2-inch sides of your cake pan.
Transfer the Dough to the Pan:
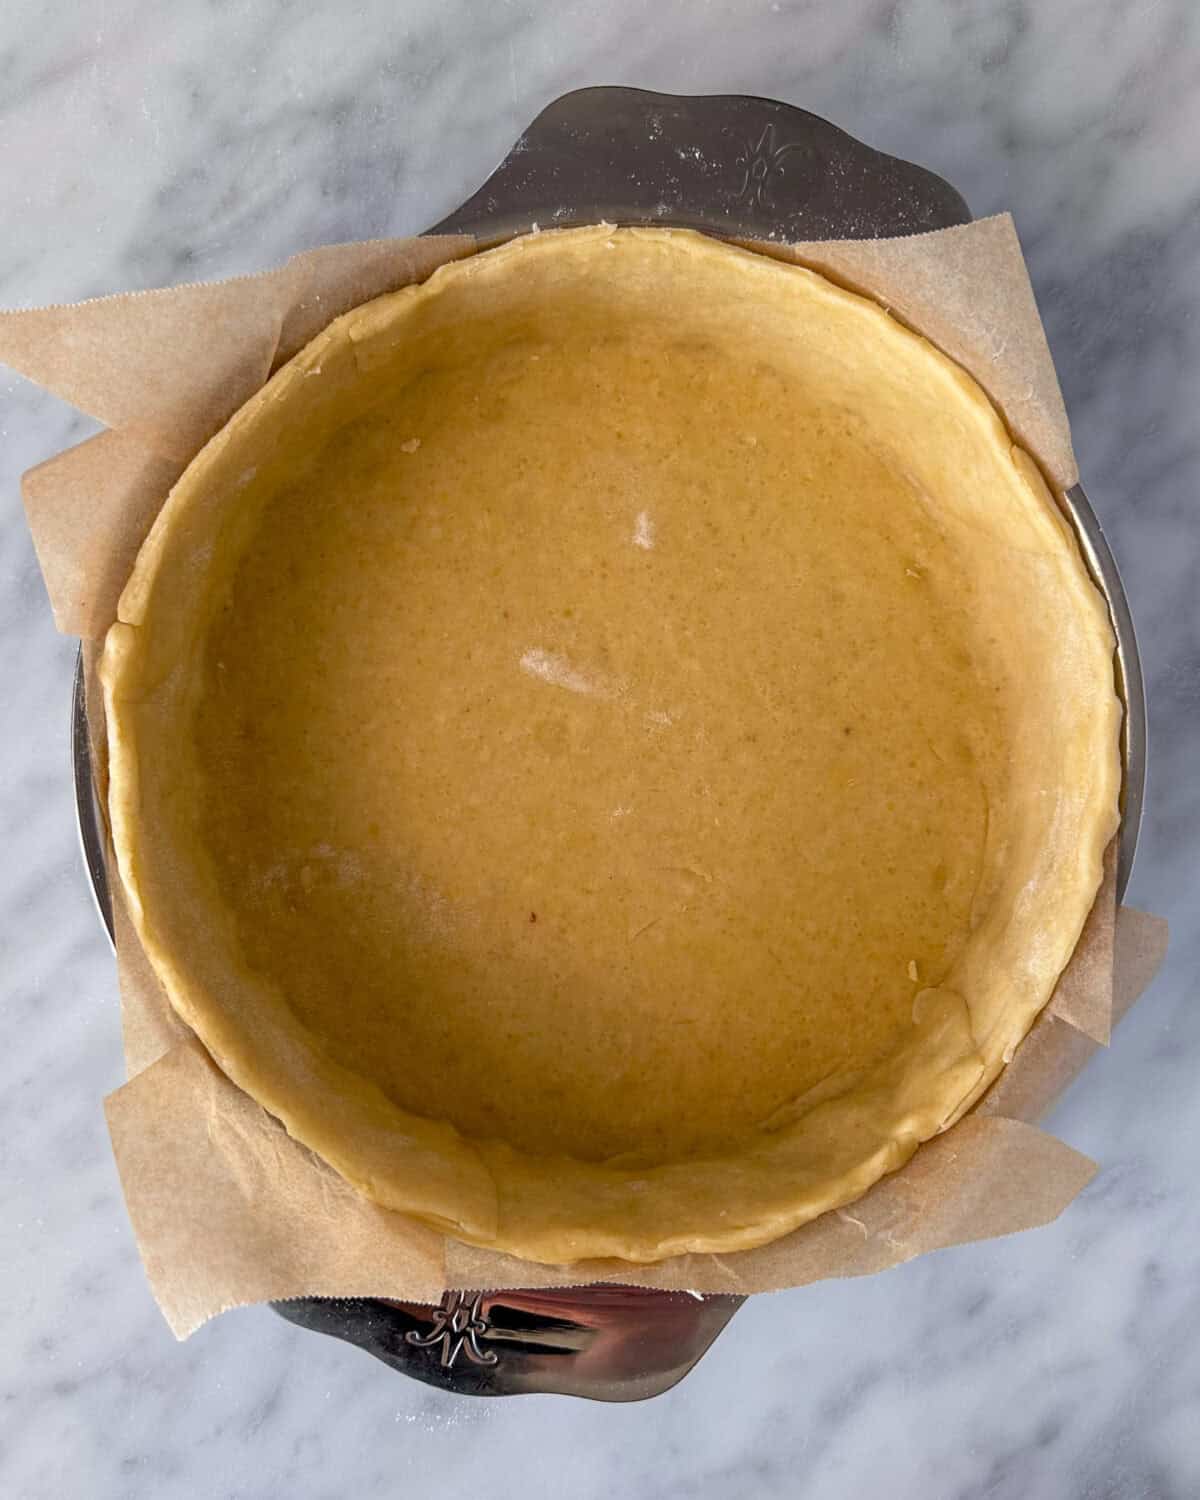
Carefully lift the dough and place it into the parchment-lined cake pan.
Gently press the dough into the bottom and up the sides of the pan, ensuring there are no air pockets.
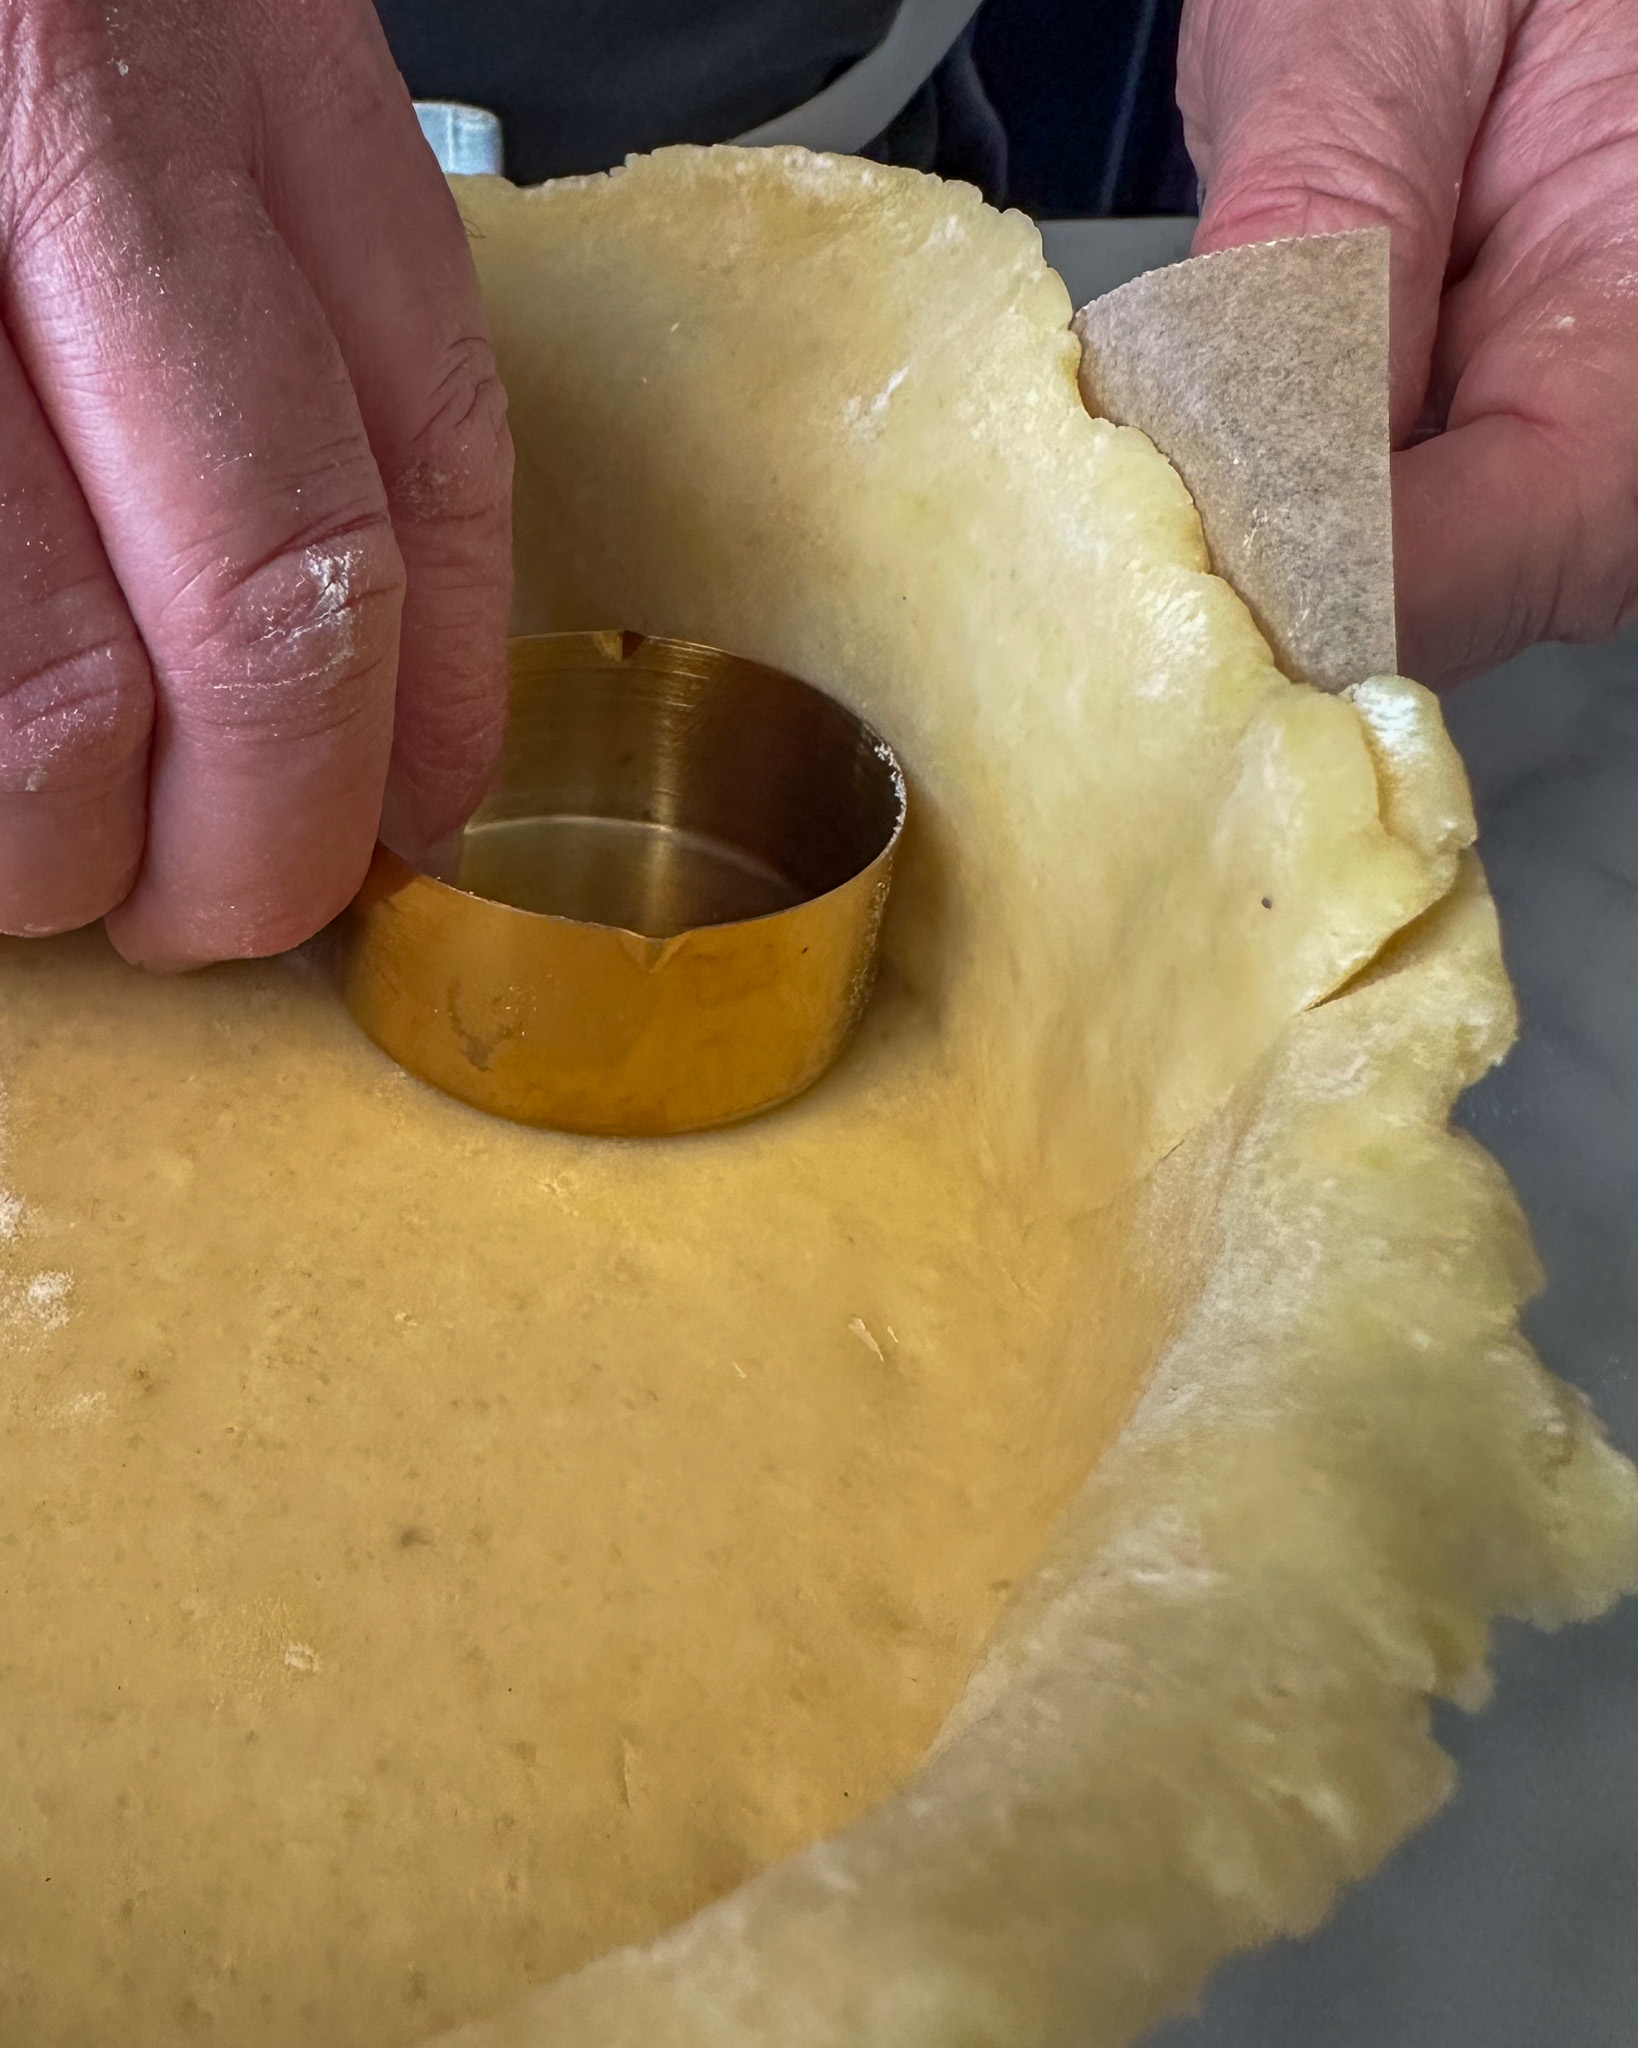
Press & Shape the Edges:
Use a ½-cup measuring cup to gently press the dough into the corners where the bottom meets the sides. This helps create a clean edge and even thickness.
Trim any excess dough extending over the top.
Chill Before Baking:
Place the pan in the fridge for at least 15-30 minutes before blind baking. This helps the crust hold its shape while baking.
Preheat the oven to 375°F (190°C) while the crust is in the fridge.
Blind Bake for a Sturdy Crust
Dock the Crust: Before adding weights, use a fork to gently prick the bottom of the crust in several places. This helps steam escape and prevents bubbling.
Loosely line the crust with parchment paper, then fill it with pie weights or dried beans.
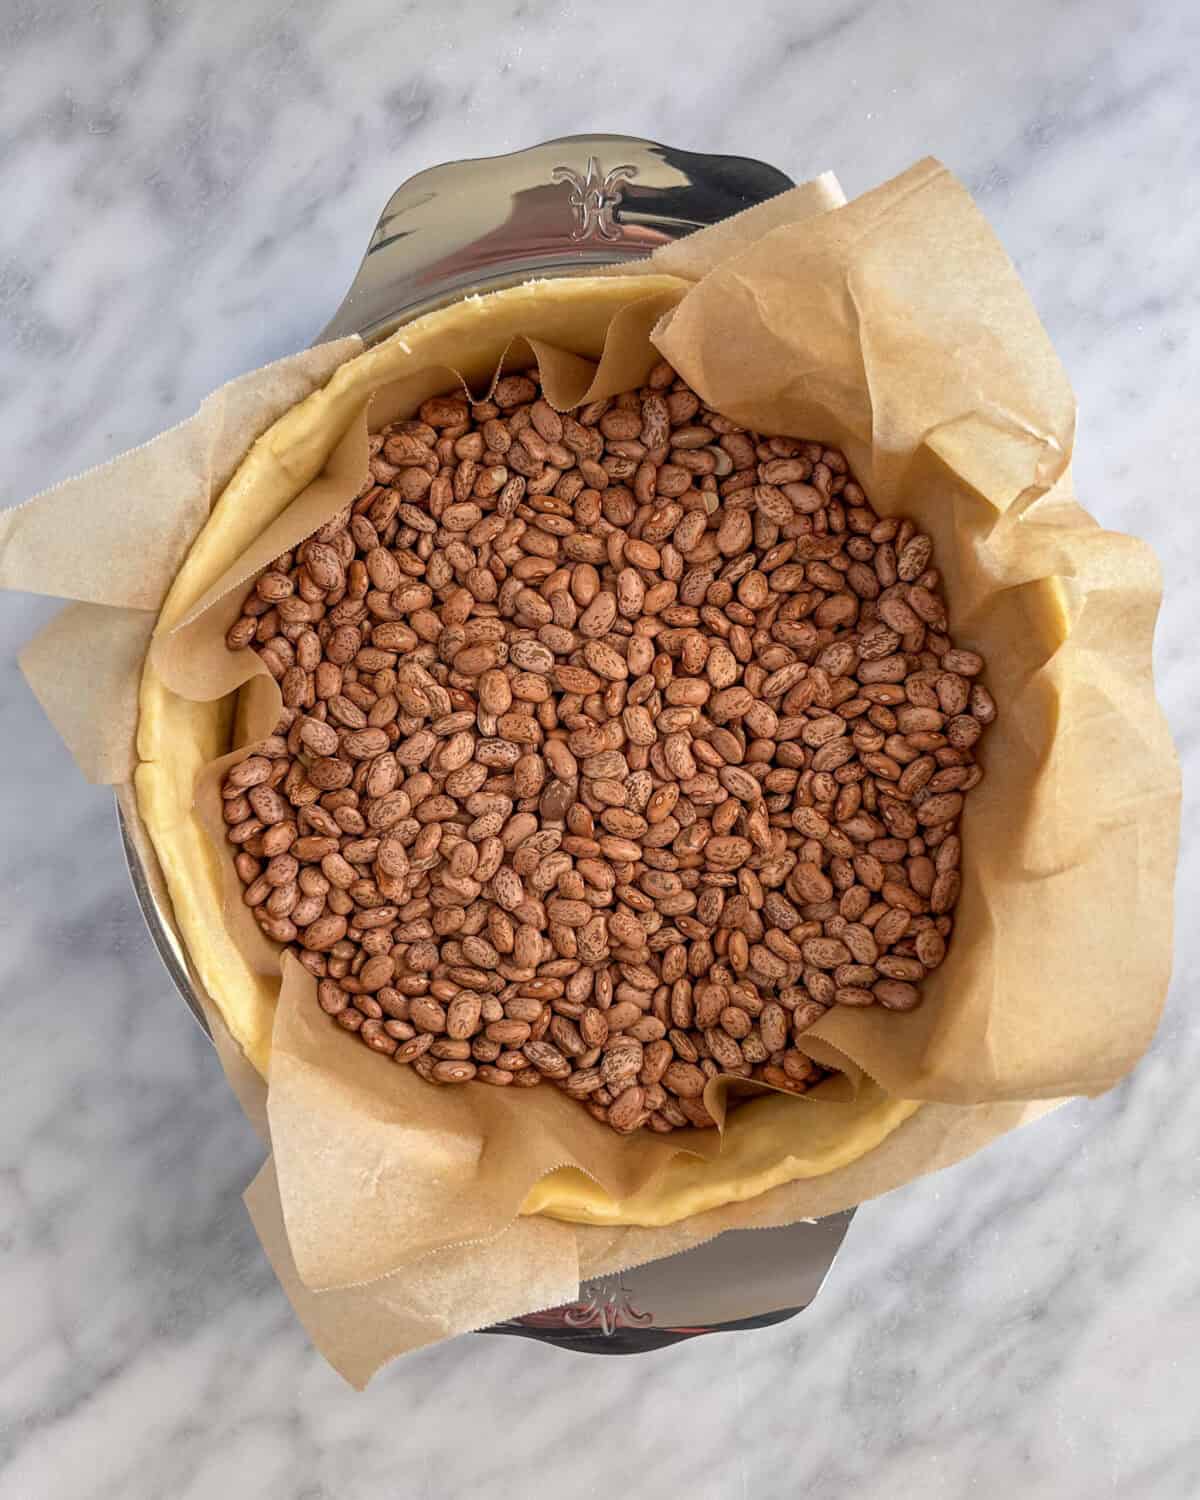
Place the pan in the oven and bake for 20-25 minutes until the edges start to set.
Carefully lift out the parchment and weights, then bake for another 5 minutes until the crust is lightly golden.
Prep the Zucchini
Use a mandoline or vegetable peeler to create thin zucchini ribbons.
Lightly salt and let sit for 10-15 minutes on paper towels (or a clean tea towel) to draw out any excess moisture.
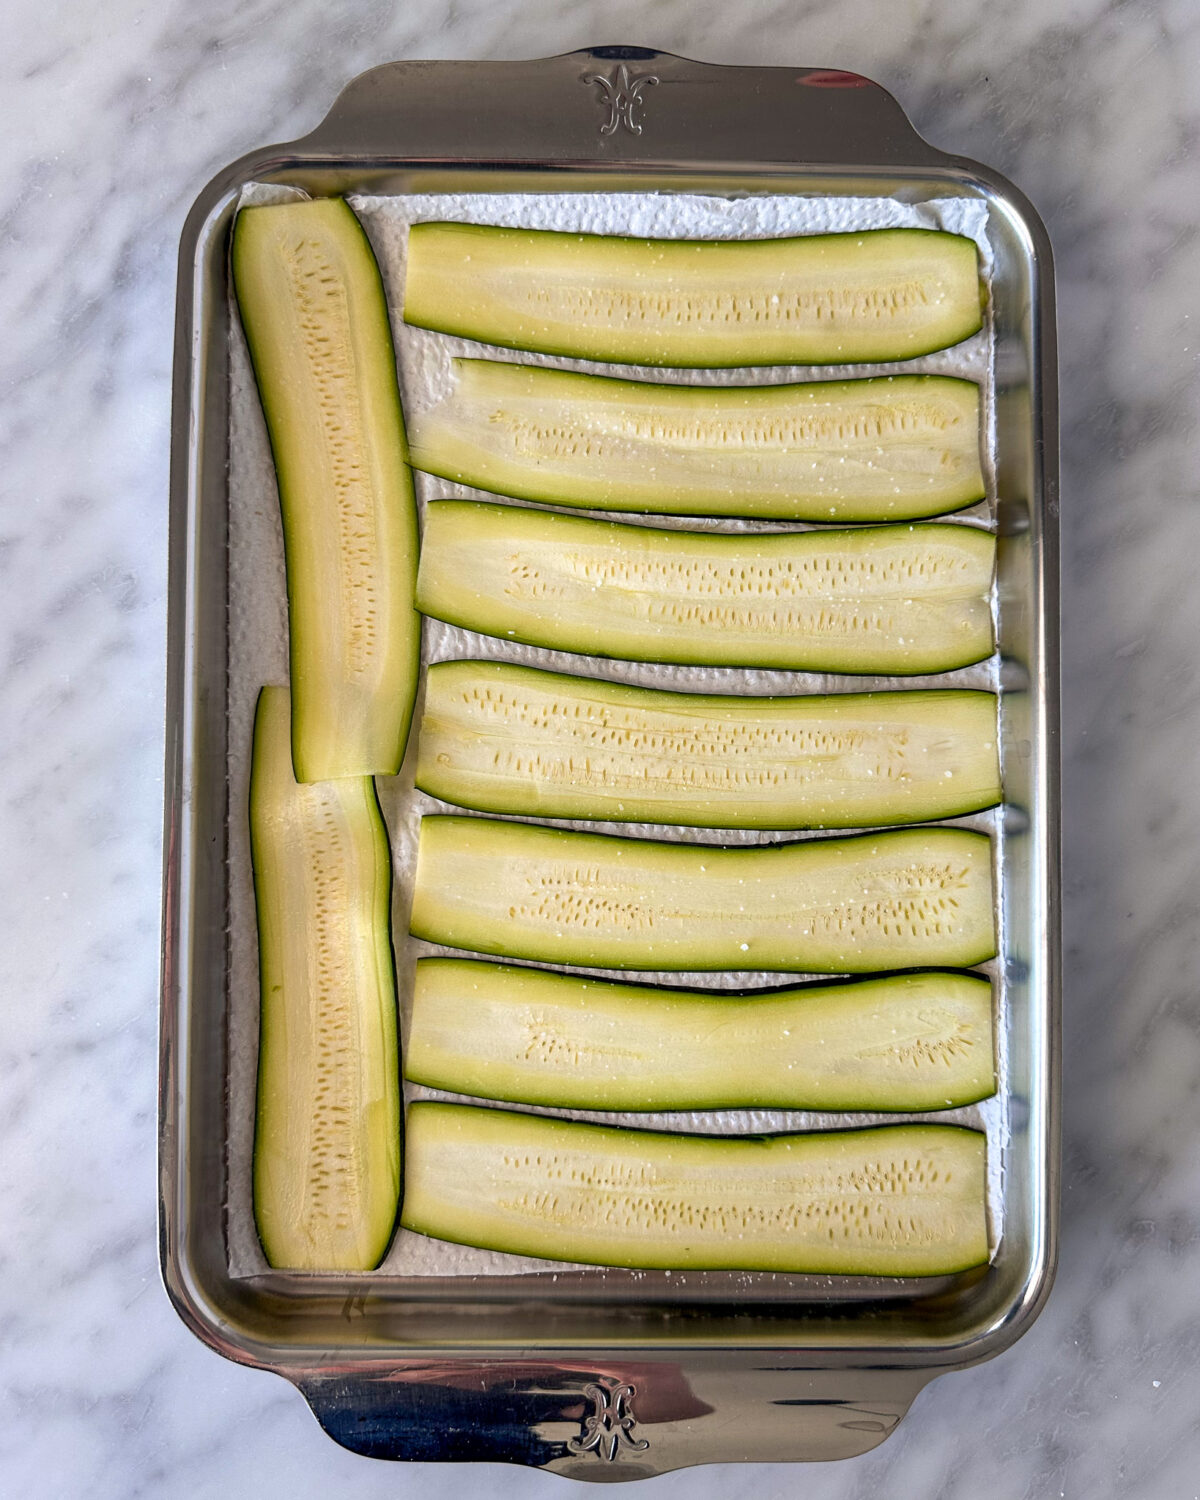
Pat dry to prevent excess liquid from making the filling soggy.
Make the Filling
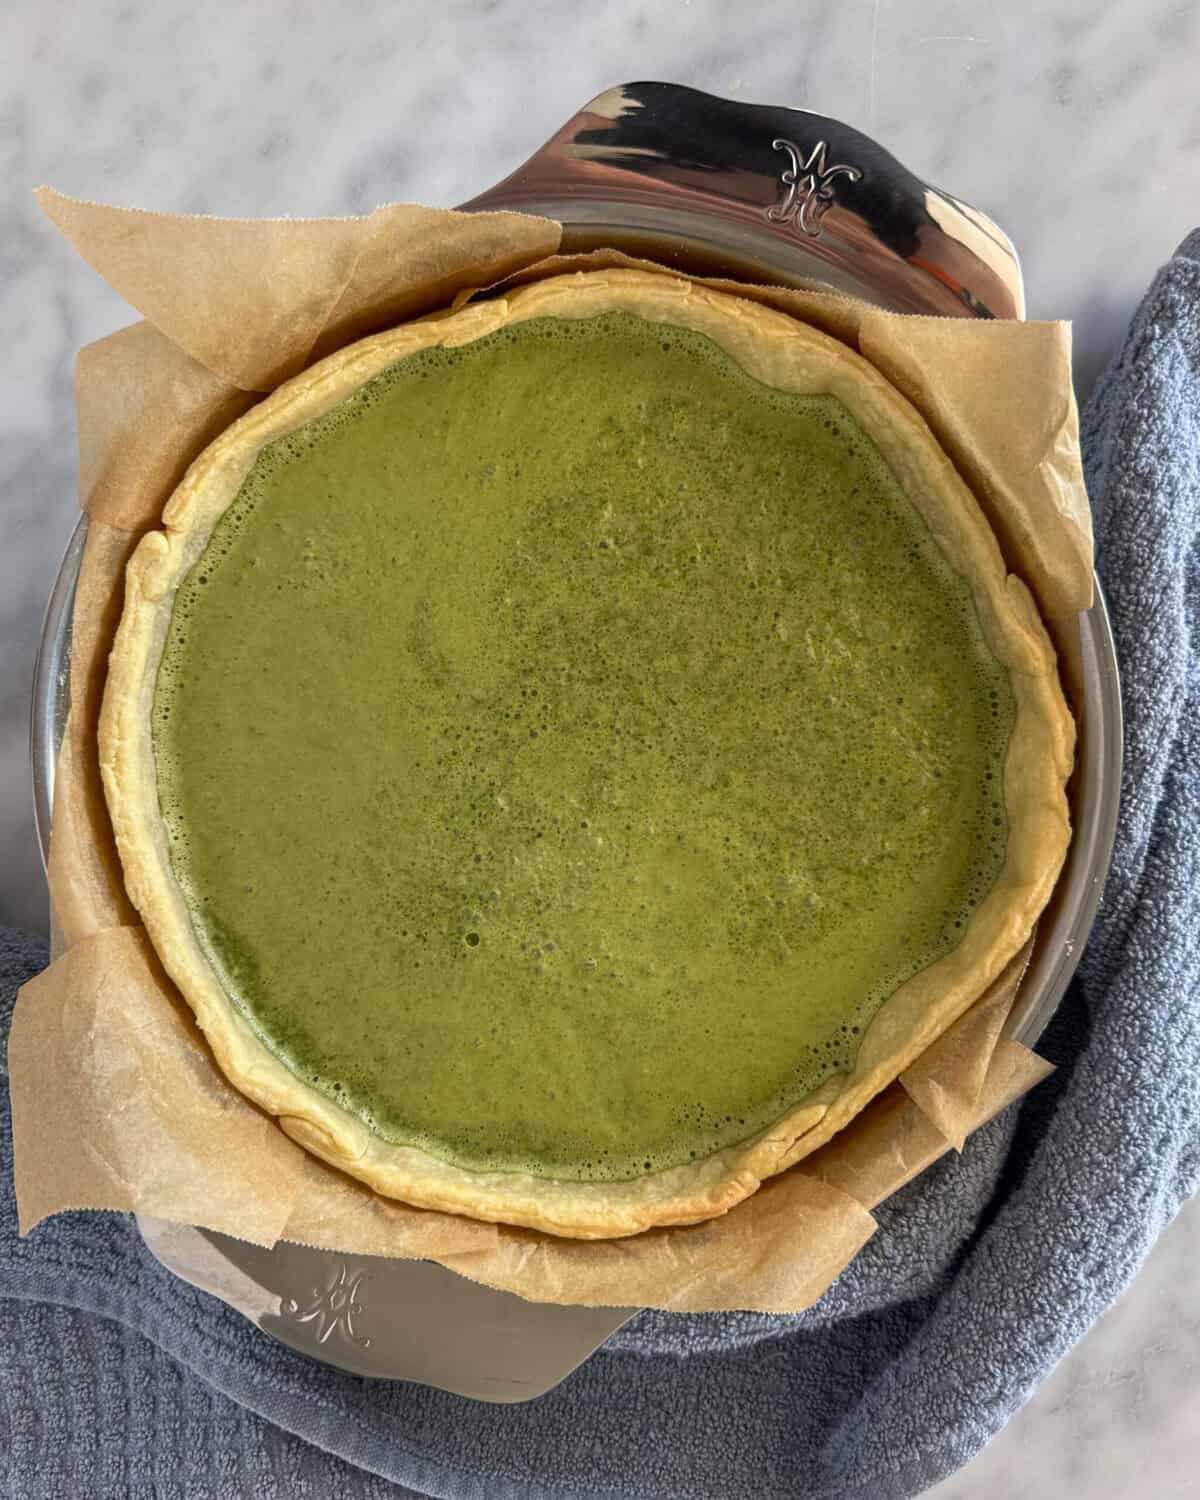
In a blender, combine spinach, basil, tarragon, chives, eggs, cream, milk, salt, pepper, and nutmeg. Blend until smooth.
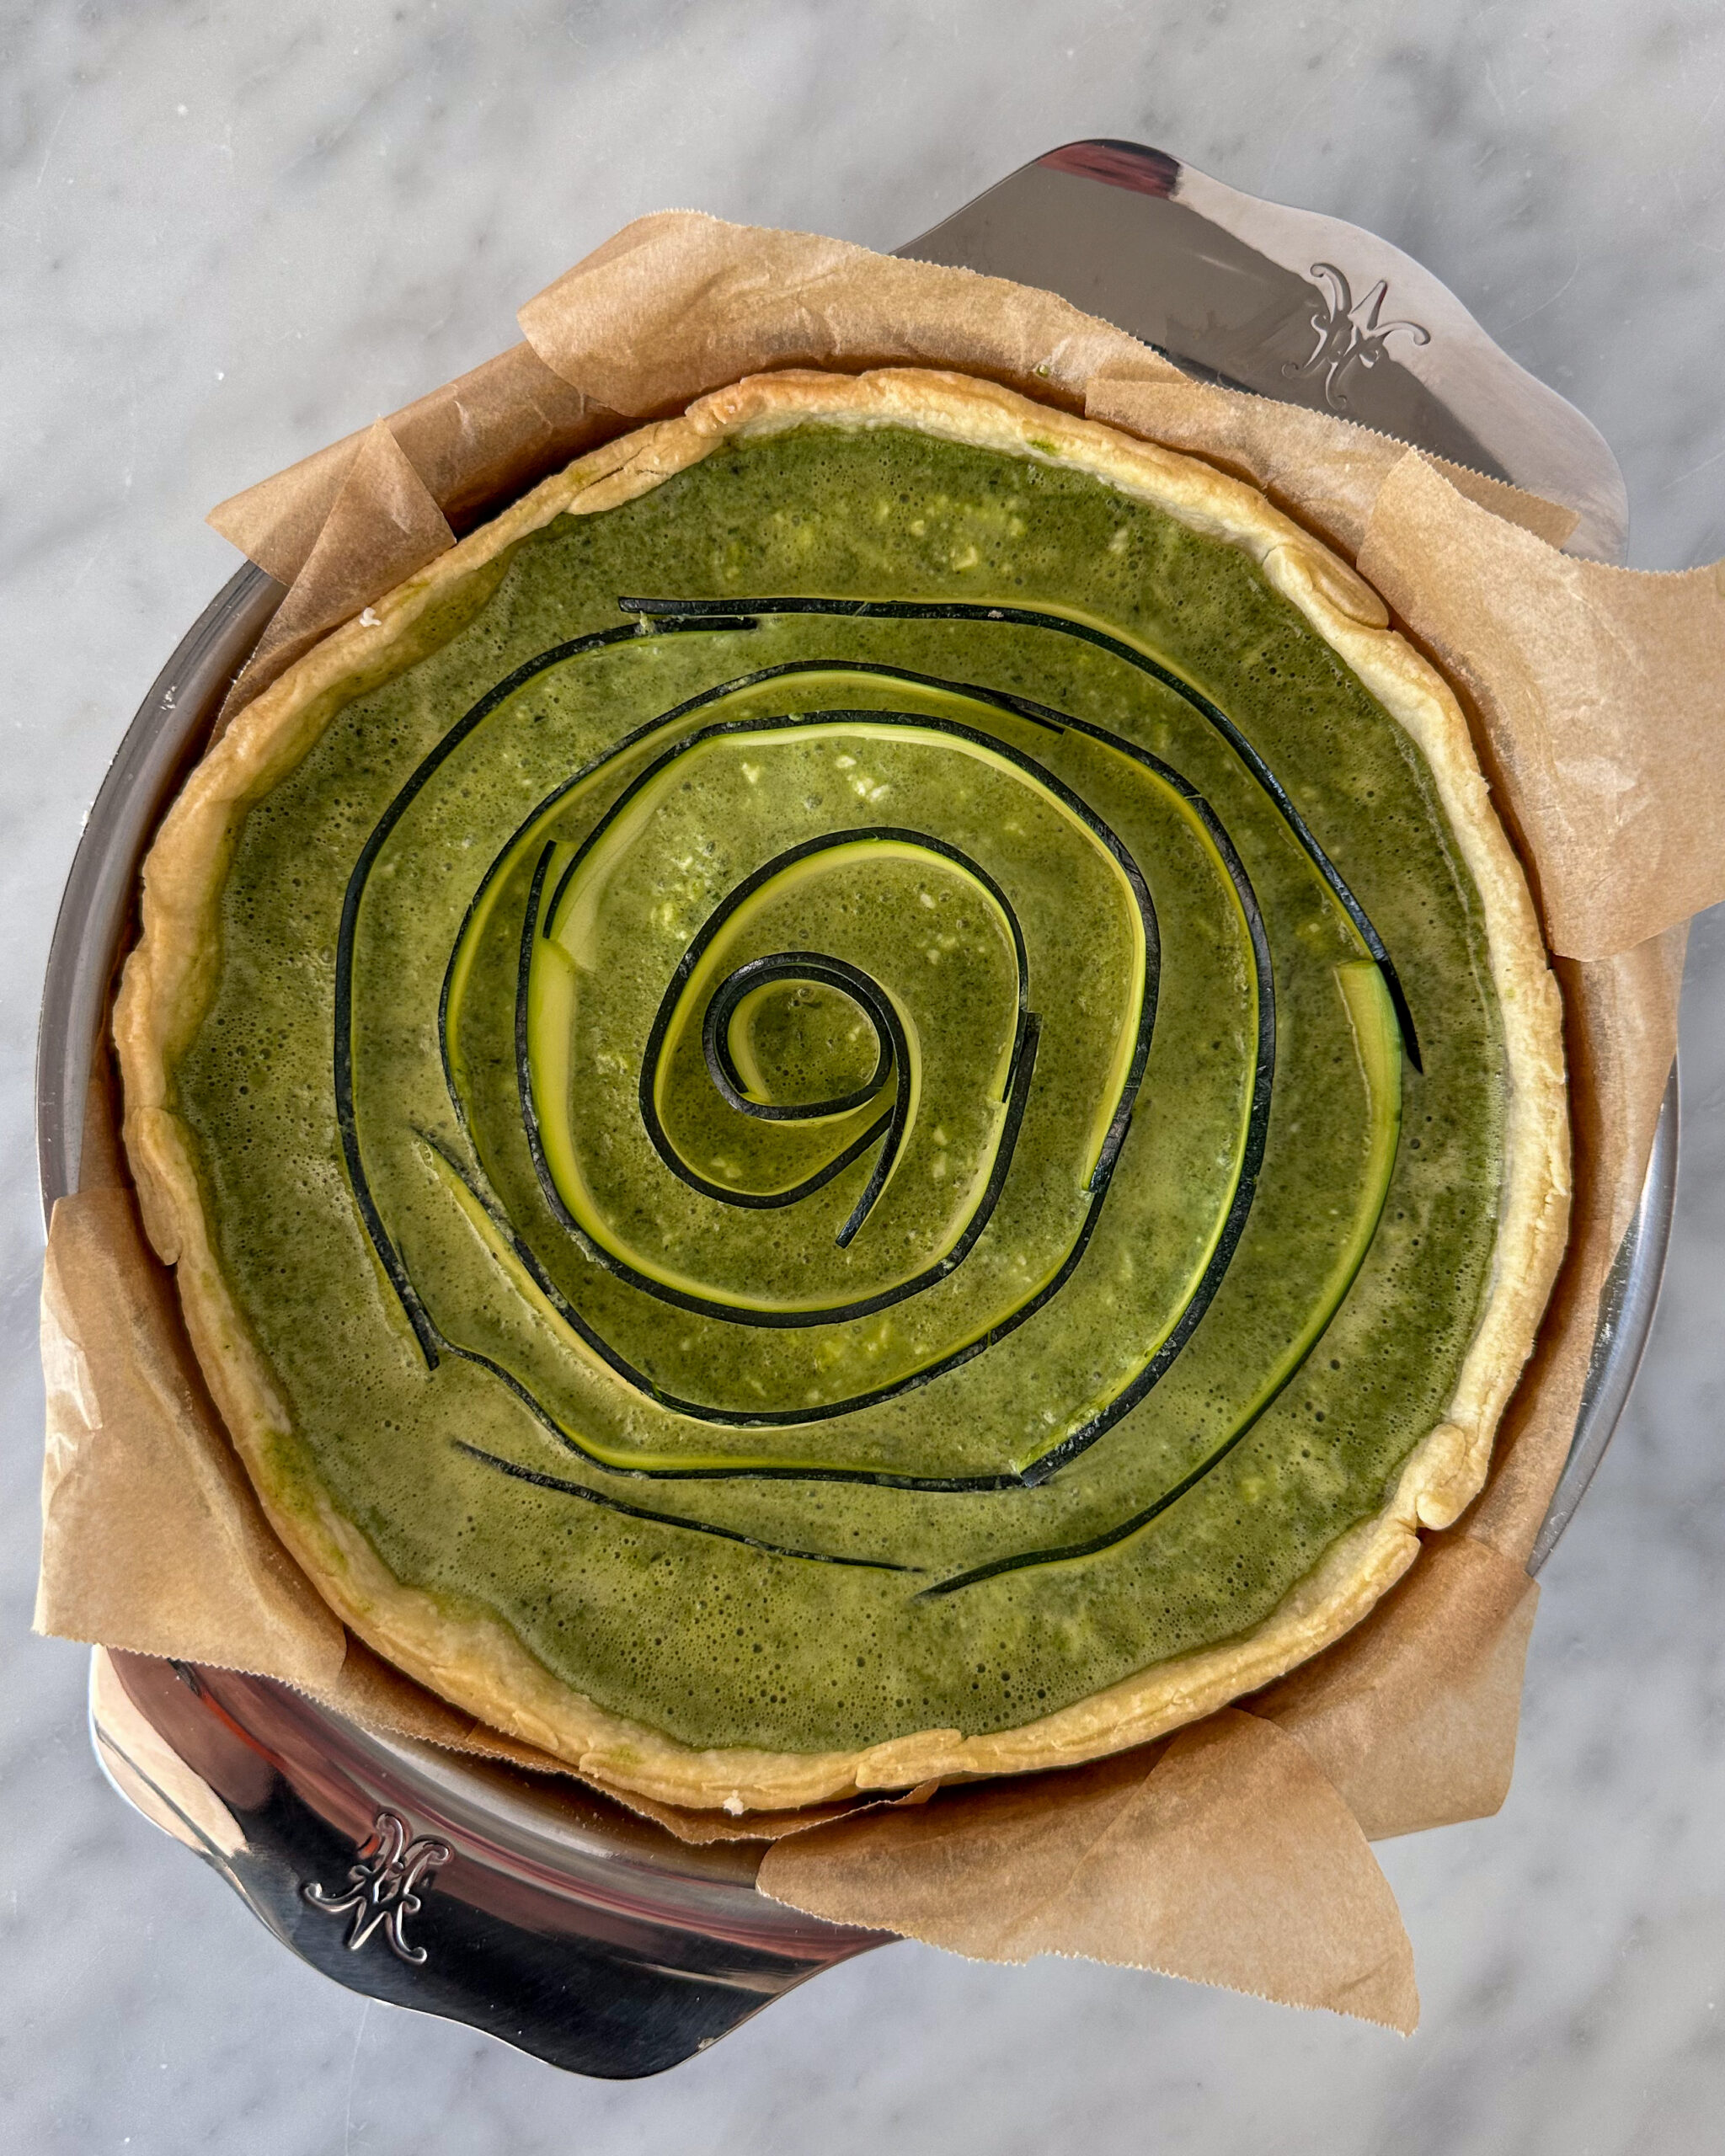
Pour the green goddess quiche mixture into the pre-baked pastry crust and evenly distribute ⅔ of the crumbled feta over the top.

Arrange the Zucchini Spiral
Roll one zucchini ribbon into a tight coil and place it in the center of the quiche.
Wrap additional ribbons around it, slightly overlapping, until the surface is covered in a spiral pattern.
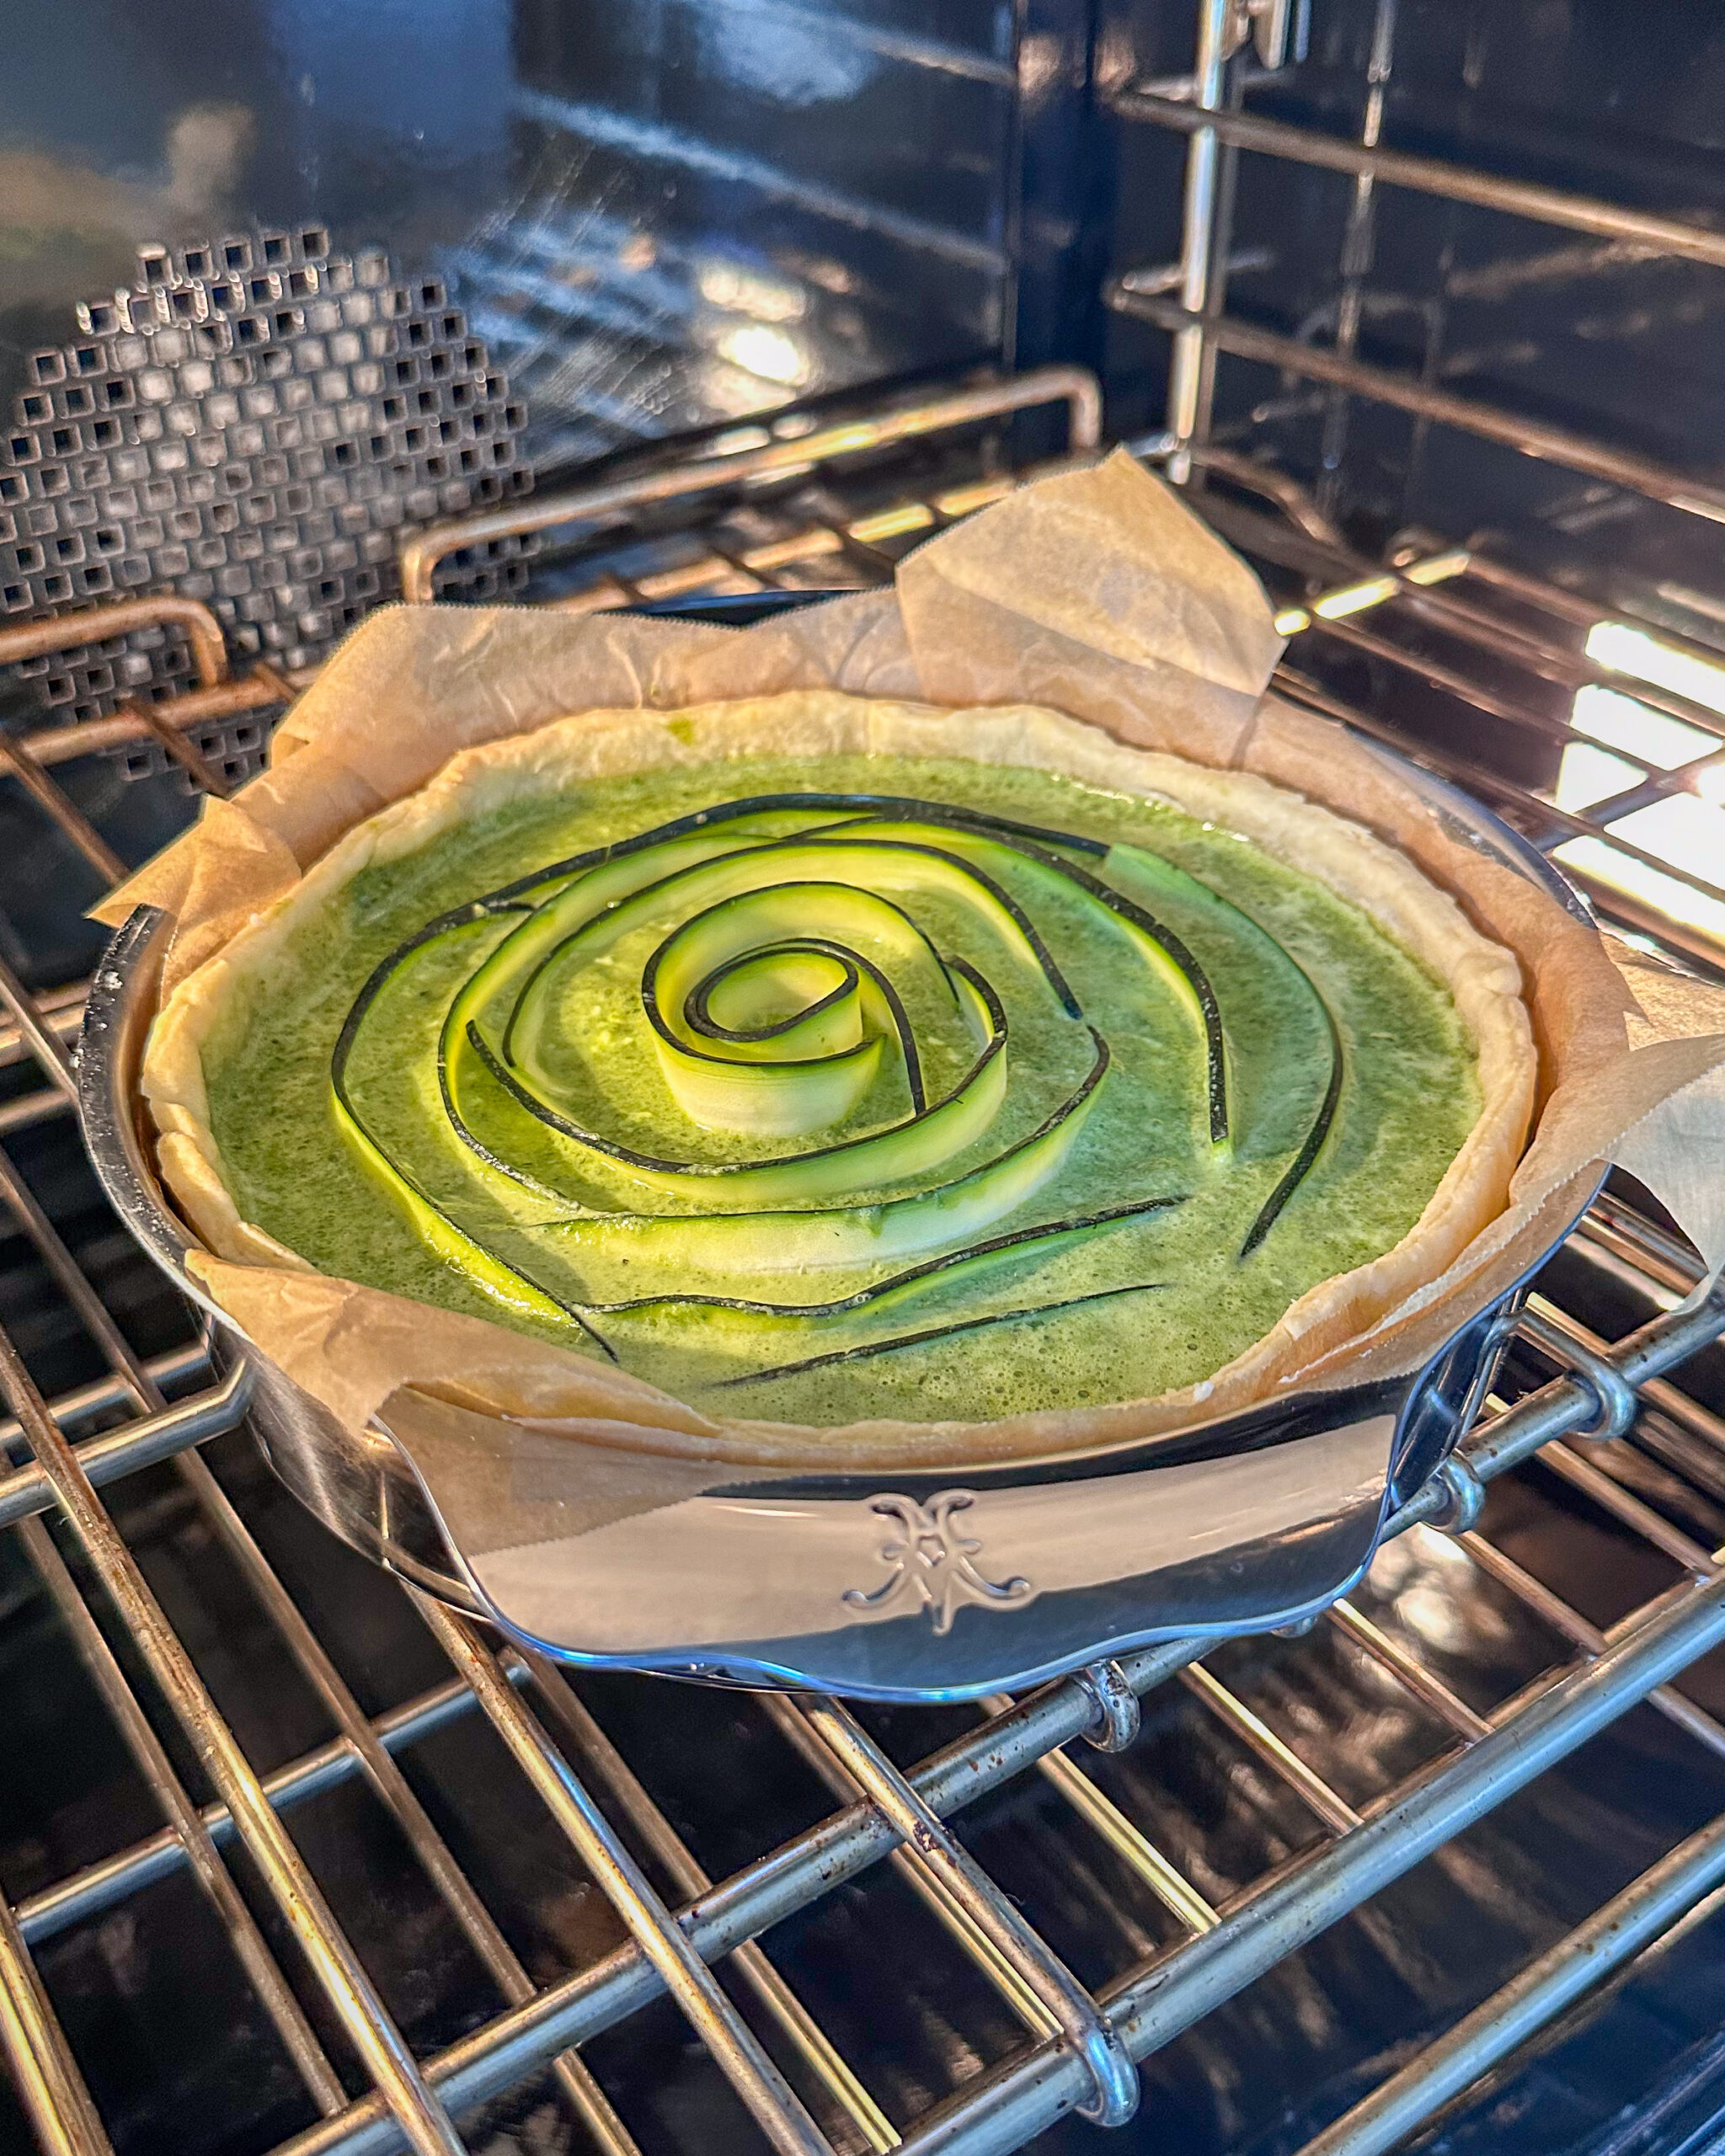
Bake & Serve
Bake in a preheated oven at 375°F (190°C) for 35-45 minutes or until the center is set and the top is lightly golden. (Cook time may vary depending on the pan, see FAQ’s)
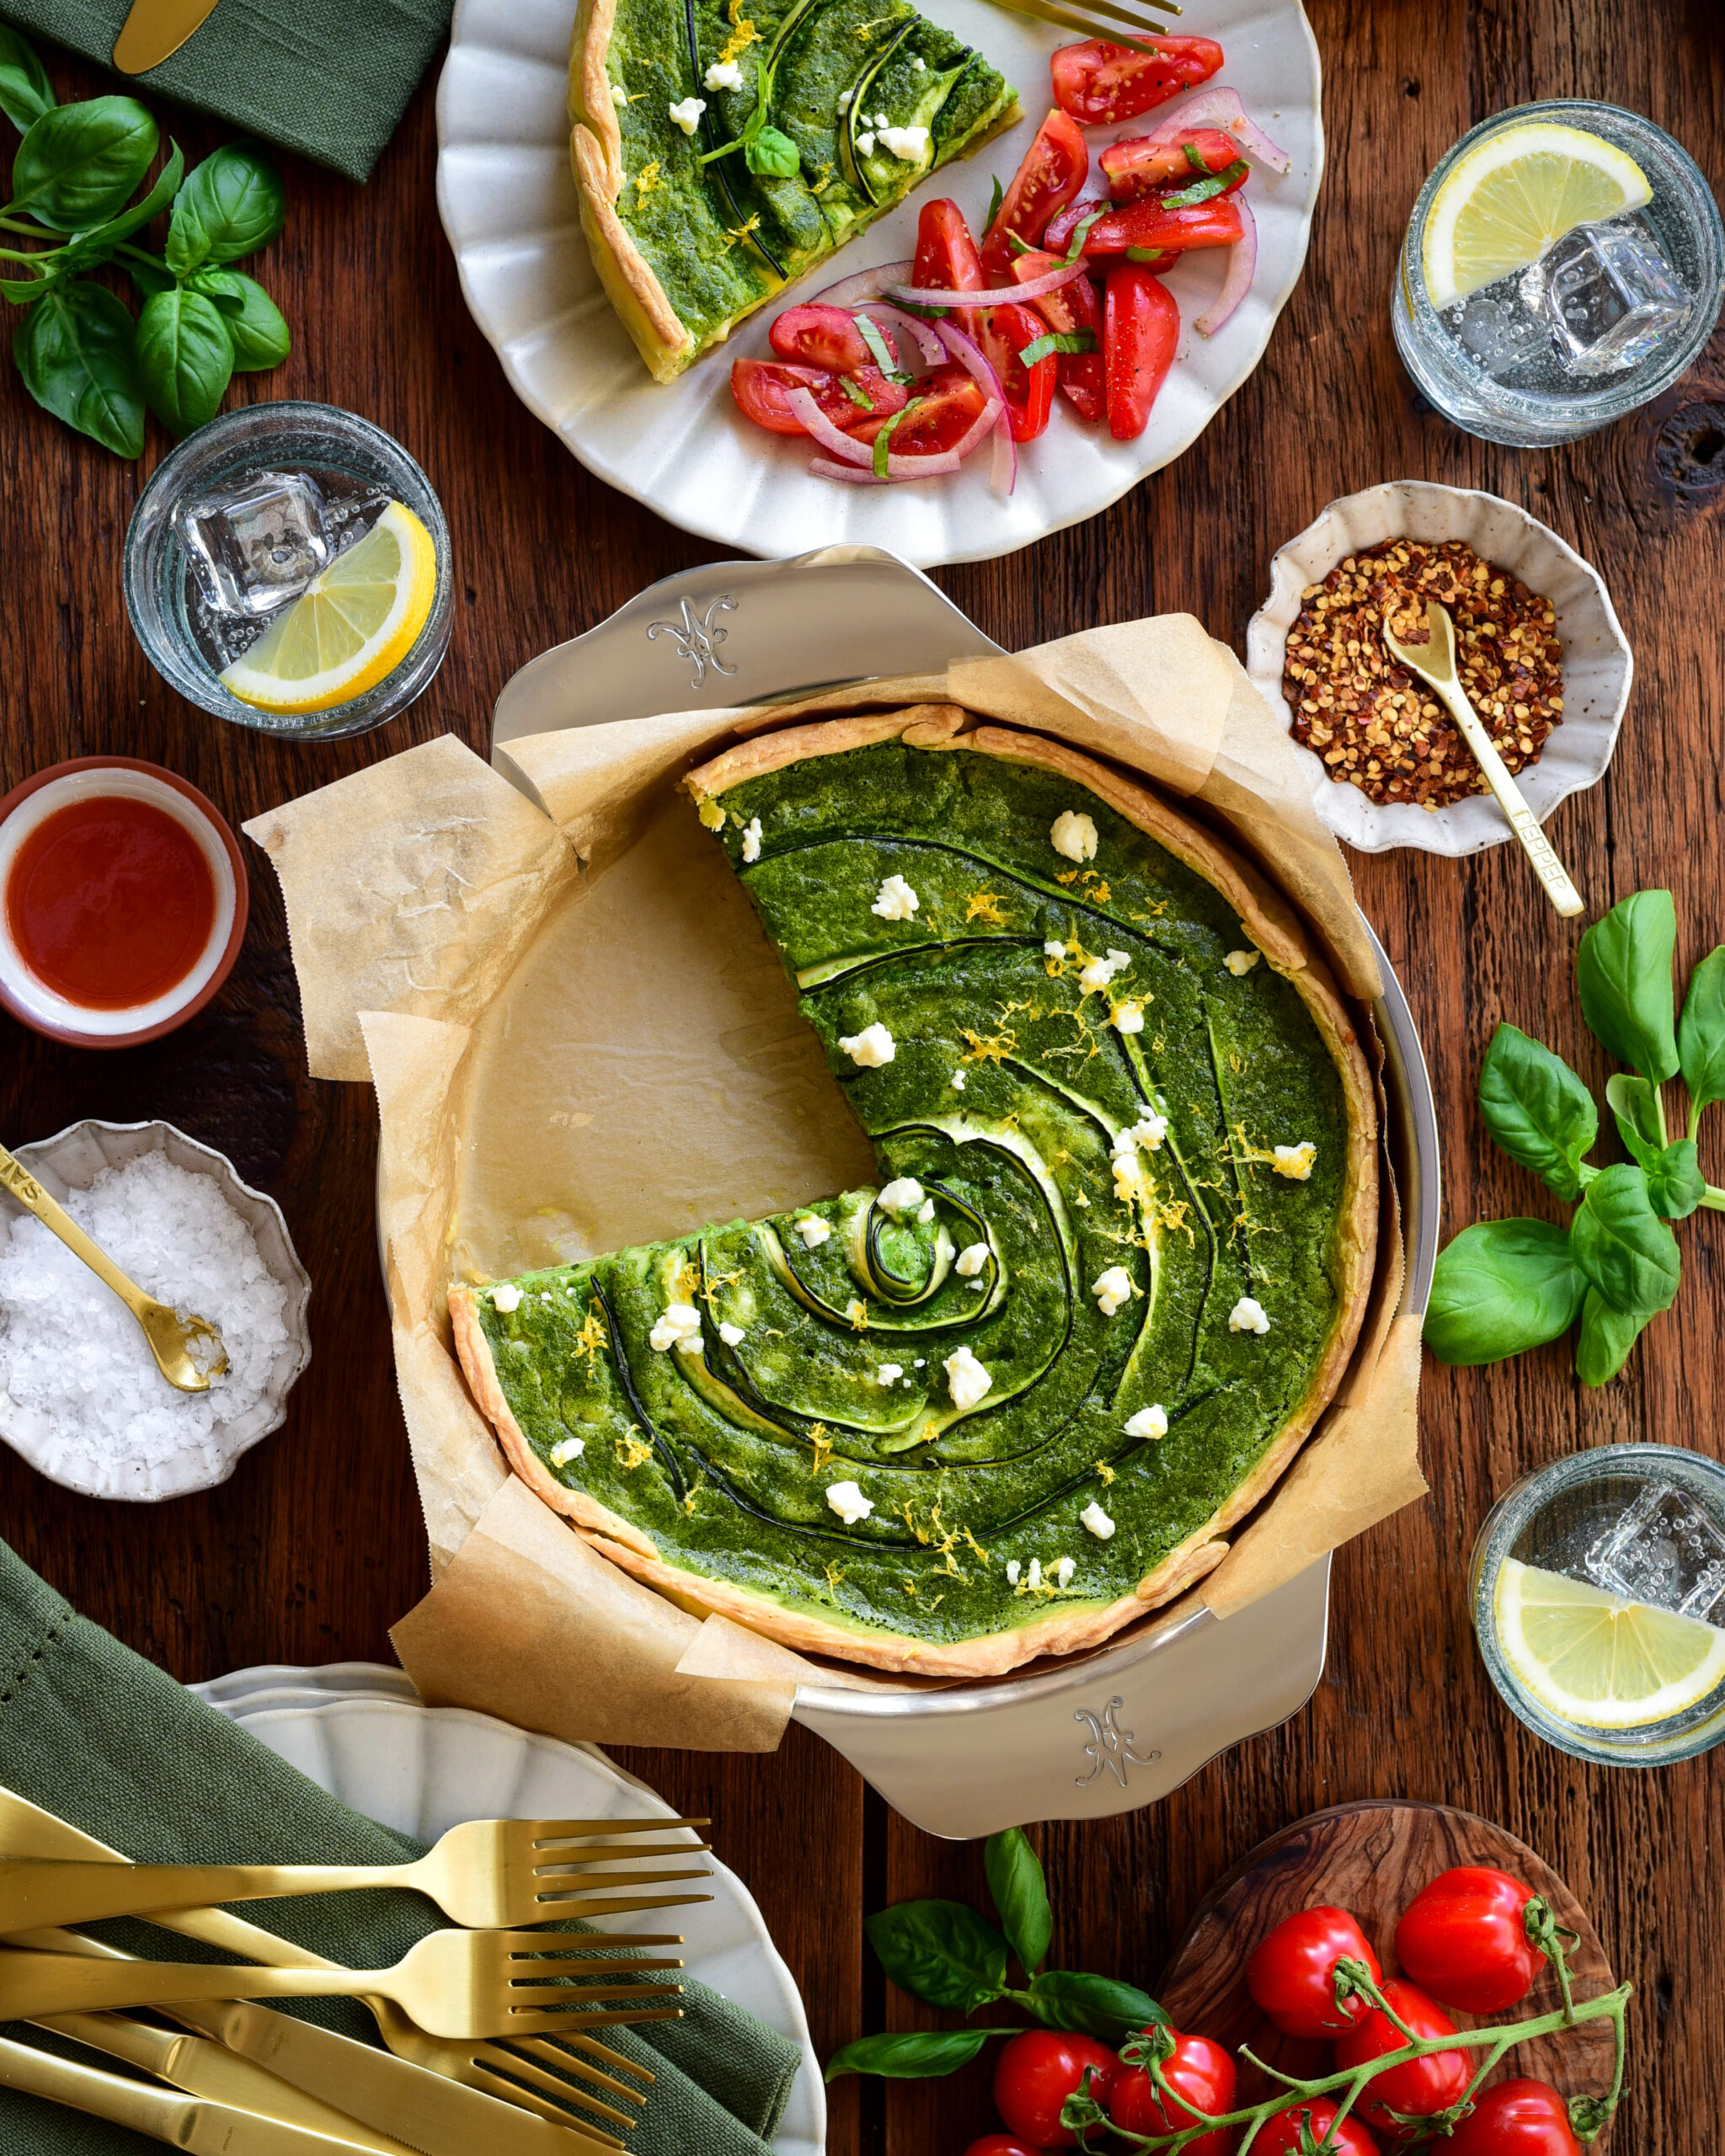
Let it cool slightly before slicing. Sprinkle with the remaining feta (or serve on the side) and lemon zest. Serve warm or at room temperature.
Serve with a simple tomato, red onion and basil salad for a fresh, vibrant meal.

Watch How This Green Goddess Quiche was Made
Helpful Tips
How to Tell When a Quiche is Done?
- The center will puff up and should be just set but slightly jiggly-it will firm up as it cools.
- A knife or toothpick inserted in the middle should come out clean.
- The edges should be lightly golden and puffed up.
Stainless Steel Cake Pan vs. Other Pans: Cook Time Adjustments
- Stainless Steel Cake Pan (Like This Recipe): Even baking, 35-40 minutes.
- Glass Pie Pan: Holds heat longer, so add 5-10 extra minutes and lower temperature by 25°F.
- Non-Stick Metal Pan: Cooks faster, so start checking 5 minutes earlier.
- Cast Iron: Retains heat well but may cook unevenly. Rotate halfway through baking.
FAQs
A: Here are a few options:
Simple Greens: Lightly dressed arugula or a citrusy fennel salad.
Crispy Roasted Potatoes or hash browns.
Fresh Fruit Salad with berries and citrus.
Smoked Salmon & Capers on the side for an extra touch of luxury.
Toasted Sourdough or Croissants for extra crunch.
A: Follow these steps:
Let It Cool First - Allow the quiche to cool to room temperature before storing to prevent condensation from making the crust soggy.
Refrigerate: Whole Quiche: Cover the pan tightly with plastic wrap or aluminum foil.
Sliced Quiche: Store slices in a ziplock bag or an airtight container with parchment paper between layers to keep them from sticking.
Shelf Life: Best enjoyed within 3-4 days.
Freezing (Optional): Wrap individual slices in plastic wrap, then place them in a freezer-safe bag or container.
Freeze for up to 2 months.
To reheat, thaw it overnight in the fridge before warming up.
A: Here are a few options:
Oven (Best Method): Cover loosely with foil and bake in the original pan or on a baking sheet at 325°F (165°C) for 15-20 minutes.
Air Fryer: Reheat at 300°F (150°C) for 5-8 minutes until warm.
Stovetop (Quick Fix): Heat slices over low heat in a covered pan for a few minutes.
Microwave: not recommended
More Quiche Recipes to Try!
From a rustic Heirloom Tomato & Pearl Onion Quiche to quick and tasty Air Fryer Mini Quiches, we've got something for every craving. Don't miss the Apple, Leek & Bacon Quiche or our bold Crustless Quiche with Bacon, Mushrooms & Jalapeños!


Equipment used for this Green Goddess Quiche: The Hestan Culinary Provisions Round Baker ensures flawless, even baking-no soggy bottoms, just perfect, silky green goddess quiche every time. Proud Hestan Culinary Ambassador. All opinions expressed in this post are our own.
📖 Recipe

Green Goddess Quiche with Zucchini & Feta
Ingredients
For the Crust
- 1 ¼ cups all-purpose flour
- ¼ cup almond meal or almond flour
- ½ teaspoon salt
- ½ cup unsalted butter cold and cubed
- 1 egg yolk
- 3 -4 tablespoons ice water
Filling Ingredients
- 2 cups fresh spinach packed, then chopped
- ¾ cup fresh basil leaves chopped
- 2 tablespoons fresh tarragon leaves chopped
- 2 tablespoons fresh chives chopped
- 4 large eggs
- ¾ cup heavy cream
- ¾ cup whole milk
- ¼ teaspoon salt
- ½ teaspoon black pepper
- ½ teaspoon ground nutmeg
- 5 ounces feta cheese crumbled and divided
- 1 medium zucchini thinly sliced into ribbons
For Serving
- 1 tablespoon lemon zest
- See recipe card below for quantities.
Instructions
Make the Dough:
- In a food processor with a dough blade, pulse the all-purpose flour, almond flour, and salt.
- Add cold butter and pulse until the mixture resembles coarse crumbs.
- Add the egg yolk and pulse again.
- Drizzle in ice water, one tablespoon at a time, until the dough just comes together.
- Shape the dough into a thick disk, wrap it in plastic, and refrigerate it for at least 30 minutes.
Prepare the Pan
- Cut a 16-inch piece of parchment paper. Flip the 9" round cake pan upside down and centre the parchment over it.
- Make diagonal cuts every 2 inches from the edge of the parchment to the rim.
- Place the pan upright and tuck the parchment inside, ensuring it lines the bottom and sides.
Rolling Out & Pressing the Dough Into the Pan:
- Flour Your Surface & Roll the Dough:
- Add a dusting of flour over your work surface and on your rolling pin to prevent sticking.
- Roll the dough into a 13-inch circle (about ¼ inch thick). This gives you enough dough to cover the bottom and press up the 2-inch sides of your cake pan.
- Transfer the Dough to the Pan:
- Carefully lift the dough and place it into the parchment-lined cake pan.
- Gently press the dough into the bottom and up the sides of the pan, ensuring there are no air pockets.
- Press & Shape the Edges:
- Use a ½-cup measuring cup to gently press the dough into the corners where the bottom meets the sides. This helps create a clean edge and even thickness.
- Trim any excess dough extending over the top.
- Chill Before Baking:
- Place the pan in the fridge for at least 15-30 minutes before blind baking. This helps the crust hold its shape while baking.
- Preheat the oven to 375°F (190°C) while the crust is in the fridge.
Blind Bake for a Sturdy Crust
- Dock the Crust: Before adding weights, use a fork to gently prick the bottom of the crust in several places. This helps steam escape and prevents bubbling.
- Loosely line the crust with parchment paper, then fill it with pie weights or dried beans.
- Place the pan in the oven and bake for 20-25 minutes until the edges start to set.
- Carefully lift out the parchment and weights, then bake for another 5 minutes until the crust is lightly golden.
Prep the Zucchini
- Use a mandoline or vegetable peeler to create thin zucchini ribbons.
- Lightly salt and let sit for 10-15 minutes on paper towels (or a clean tea towel) to draw out any excess moisture.
- Pat dry to prevent excess liquid from making the filling soggy.
Make the Filling
- In a blender, combine spinach, basil, tarragon, chives, eggs, cream, milk, salt, pepper, and nutmeg. Blend until smooth.
- Pour the quiche mixture into the pre-baked pastry crust and evenly distribute ⅔ of the crumbled feta over the top.
Arrange the Zucchini Spiral
- Roll one zucchini ribbon into a tight coil and place it in the center of the quiche.
- Wrap additional ribbons around it, slightly overlapping, until the surface is covered in a spiral pattern.
Bake & Serve
- Bake in a preheated oven at 375°F (190°C) for 35-45 minutes or until the center is set and the top is lightly golden. (Cook time may vary depending on the pan, see FAQ’s)
- Let it cool slightly before slicing. Sprinkle with the remaining feta (or serve on the side) and lemon zest. Serve warm or at room temperature.
- Serve with a simple tomato, red onion and basil salad for a fresh, vibrant meal.
Rate this Recipe
- Please take 5 seconds to rate this recipe in the comment section below. We would greatly appreciate it!


Looks like a keeper for Easter Celebration!
Thank you so much, Patricia!
We are delighted to hear that you’d consider this recipe for such a special celebration.
Have an incredible day and Easter weekend!
Elaine & James